The symbol above is from Devanāgarī Sanskrit. There are many ways to experience the depth and richness of chanting Om. Om is the divine, creative sound vibration present in everything in the universe. It is the source of creation. When we chant it, we connect with the fullness and diversity of the cosmos, opening ourselves to endless possibilities. The sound Om is not a secret. It is a healing tool available to everyone. Regular practice unlocks its full potential.
Preparing to Chant
Find a comfortable position where your body can be soft and relaxed. The intention is to allow the vibration of Om to flow into every cell. Our bodies are mostly water—around 60% fluid. Inside each cell, two-thirds of this water moves and nourishes, while the rest—blood, lymph, and interstitial fluid—flows quietly, connecting every part of us. When we chant Om, we are not just making a sound; we are vibrating this inner ocean. The long, resonant hum ripples through our tissues, awakens our cells, and invites the fluid within to flow freely. Muscles soften, joints glide, and the breath deepens, as though the inner river of life itself is chanting back. Through Om, we are reminded that we are living, moving water, ever renewing, ever connected—an ocean in motion, expressed through the sacred vibration that begins and ends all things. The more we surrender and relax, the more the vibration carries through our system. We can float on the sound and allow it to guide us.
Using Om in Practice
Focus on areas of the body where you feel tension or discomfort. You can emphasize the three parts of the Om sound on specific chakras. Let the pitch come naturally; sometimes it will be lower, sometimes higher, according to your energy. In a group, it is not necessary to chant together; slightly staggered chanting strengthens the vibration.
The Three Parts of Om
O – Part one of the sound.
Form your mouth into a round shape, soft and relaxed. Focus the “O” in the belly area, around the Manipura (मणिपूर) chakra, the “City of Jewels.” This chakra governs personal power, will, confidence, transformation, and vitality.
AHH – Part two of the sound.
Let your jaw drop naturally and open your mouth comfortably. Draw this sound into the heart area, the Anahata (अनाहत) chakra. Anahata represents love, compassion, balance, and emotional healing. Physically, it resonates in the shoulders and upper back.
MMM – Part three of the sound.
Gently close your lips and let the vibration purr softly. Direct the vibration to the roof of the mouth, activating the Sahasrara (सहस्रार) chakra, the “Thousand-Petaled” crown chakra. This chakra embodies spiritual connection, higher consciousness, and divine wisdom.
Three Om chants are often used before beginning Hatha Yoga practice. At the end of practice, you may choose to sound one Om as completion. Five Om repetitions are said to initiate transformation. Seven Om repetitions correspond to the seven major energy centers. Om can also punctuate your asana practice: after a Sun Salutation (Surya Namaskāra, सूर्य नमस्कार), at the end of a series of forward bends, or after balancing poses. Use Om to connect with the Earth below and the sky above, and to feel the flow of energy within. The possibilities for exploration and healing are endless.
✨ Om is more than a sound. It is a living vibration, a river of life, a bridge between the inner and outer universe.
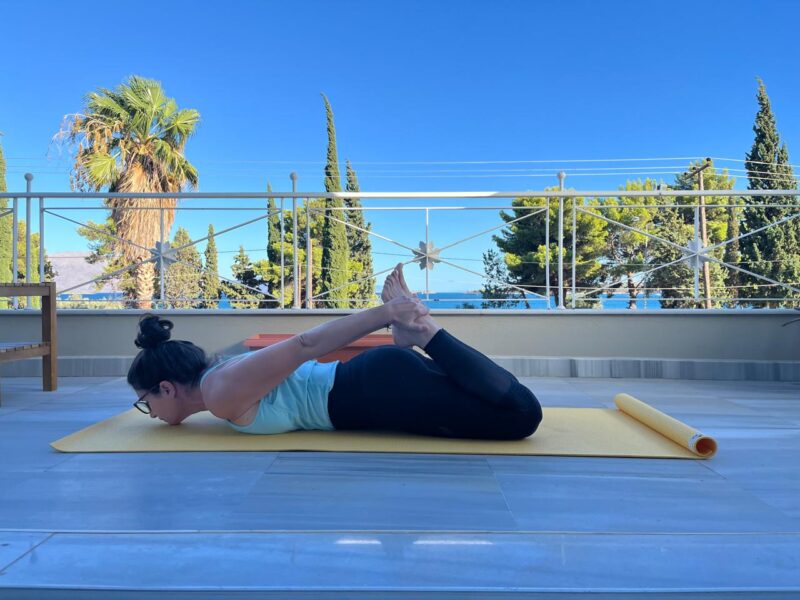
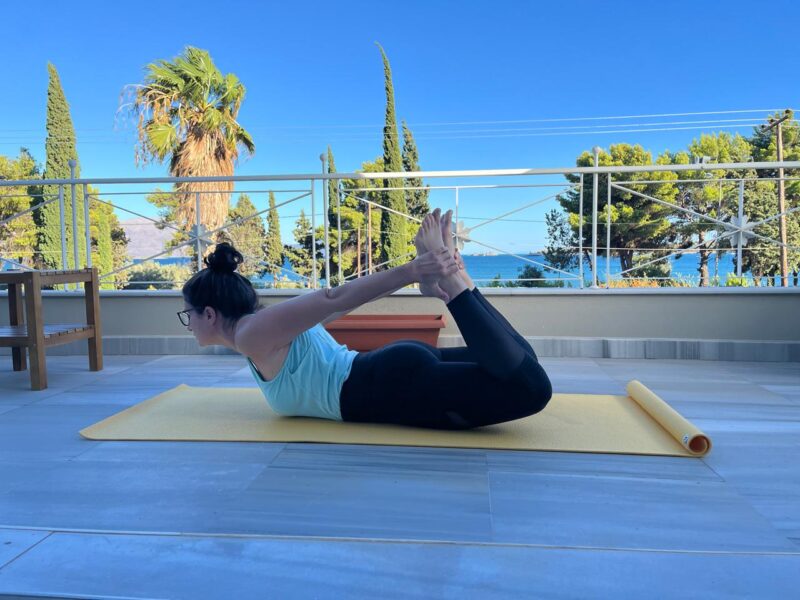
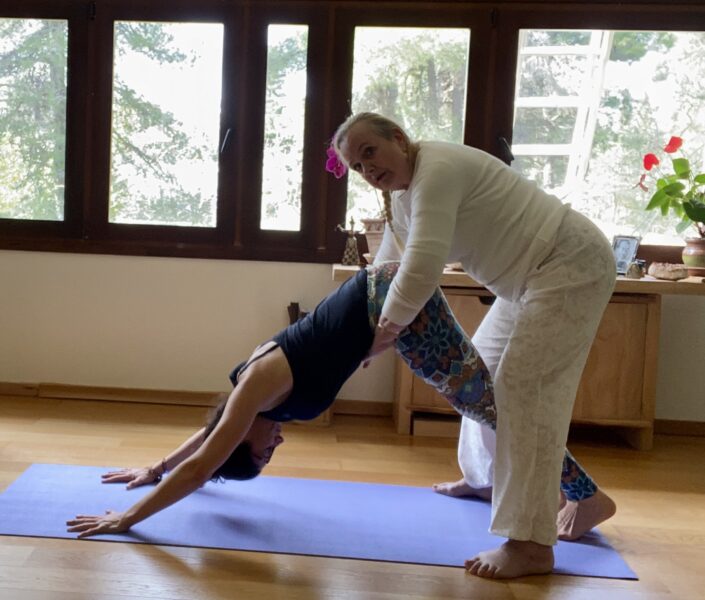
The Bow Pose is wonderful. Please refer to my blog about the third position of the spine or third spinal succession https://jennycolebourne.com/the-third-spinal-succession/. it is essential that you understand all the details about how to safely enter an arched spine. Doing it in the right way is deeply healing. If we do it with a lack of attention to detail, it can cause strain in the spine.
BENEFITS
The Bow Pose is beneficial for all humans.
The Bow Pose is excellent for anyone who has tension, or strain, in the neck and the upper back. It is. super for people that have kyphosis.
It is essential, in our practice, whether our practice is Pilates, or Hatha Yoga, or another form of movement, that we have a practice that balances movements that are curling the spine with movements that are arching the spine. We should include sideways bending of the spine and spinal twisting. In effect the spine enjoys, and is healthy, and feels good, when it’s able to move easily in all directions. The vertebrae, and the discs between them, are like individual joints. The discs between the vertebrae are strong. They have tone and they also need to be flexible. There shouldn’t be any tightness in the discs, they should be available to movement.
The Bow Pose is excellent for people that have backache, not only because of the arching of the spine, but also the gentle stretch in front of the thighs, which leads to a stretch in front of the hip joints, which leads to a gentle opening of the psoas muscle. This muscle can become very restricted and tight through trauma, through shock. It is an archetypal muscle. It also becomes shortened through our lifestyle which often, today, involves us sitting a lot.
Everyone should be conscious of leg alignment. This is particularly true for people that have knee pain. Please refer to my blog on leg alignment https://jennycolebourne.com/good-leg-alignment-is-essential-for-everyone/. The Bow Pose can be adapted. There are easier variations. I will write about this in a future Blog.
STARTING POSITION.
Remember that if you set up your starting position carefully, the rest of the exercise or Asana will be even more effective.
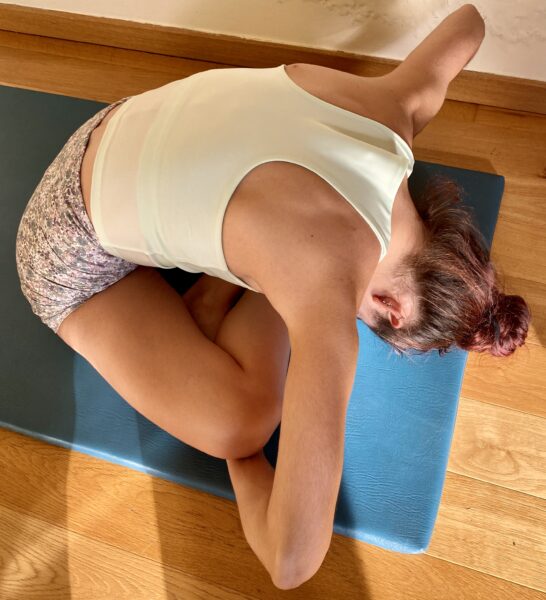
Lie on your tummy with the arms resting down beside you. Have the legs a little bit apart. Turn the head to one side and relax. For those of you familiar with Yoga, this is Savasana on the tummy. The elbows are.slightly bent. Relax around the shoulder blades. Pay particular attention to the space between the shoulder blades. Really soften in that space. The lower back and the buttocks are completely relaxed. The legs can roll in any direction, whatever is comfortable for you. The hip joints are very relaxed. Surrender to gravity.
BREATHE EASILY AND DEEPLY
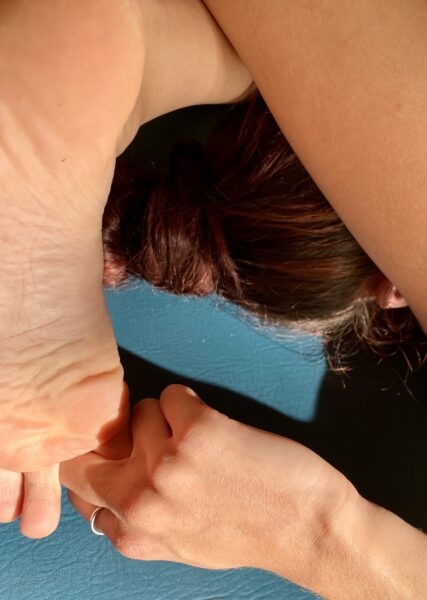
In a very, very relaxed way, bend the knees, so that the feet come towards the buttocks. Remember the joints are soft, available, for movement. Reach back and take a hold of your ankles with the palm of your hand. Keep the fingers of the hand softly together. You want to create support with the palm of the hand so your feet can literally rest in your hands. The arms throughout the posture remain very relaxed.
Bring the chin onto the floor, the pressure that this creates in the jaw is actually good for us, because as we lift our head, the pressure dissipates and stimulates the jaw to relax. Relaxing the jaw is important because any tension in the jaw, is related to tension in the neck.
The very first movement that you make is, again, very soft. Send your shoulder joints, gently back of your collarbone. It is a small movement but you will feel your shoulder blades automatically gently slide closer to one another. Concentrate on relaxing that space between the shoulder blades. You won’t be forcing the shoulder blades together. The movement will happen naturally, you just cooperate with that, by softening so that the movement can happen fully. A space will open up between the end of the collarbone and the shoulder joint. This small space brings so much relief when we open it. We actually can feel the articulation in the shoulder joint. Often we have so much tension in these areas that we can no longer feel the articulation. Opening this space is very relieving, especially for people with kyphosis. it is also extremely relieving and important for people with shoulder pains or problems such as frozen shoulder for example. As you move into this posture maintain this opening. Be conscious of it. It is a very beautiful space in the body.
MOVING INTO THE ARCH
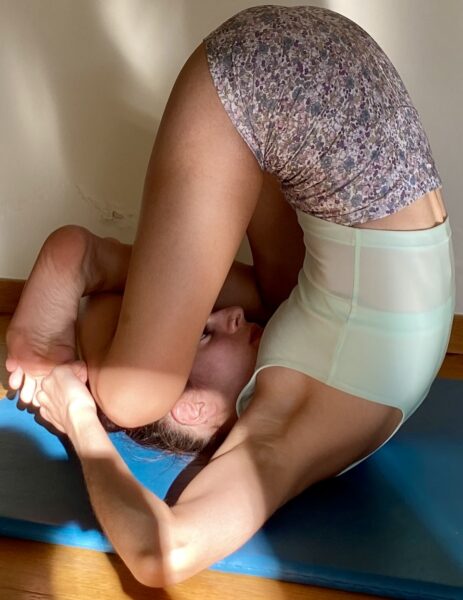
Start the third spinal succession from the bottom of the spine. Refer to my blog for lots of detail. Your focus will be on the front edge of the spine which actually relates to a very important energy channel, or Nadi, which is called the Shushumna. Anatomically focusing up the front edge of the spine starting at your tail, (which comes halfway down the crack of the buttocks. It is lower than many of us think), or coccyx, send one vertebra, at a time, up and back. The spaces, or discs, in between each vertebra, open like a fan. In order for the arching to be effective, the back body needs to be as soft as possible, in order to permit the opening in the front body. This focusing up through the front of the spine, starting from the front of the tail, then going through the front of the sacrum then through the front of the fifth lumber, and so on, means there is a delay, a small delay but eventually that process results in the raising of the head and then the lifting of the upper back. The arch is distributed throughout the spine. There is no strain.
When you have reached the peak of your arch, feel the front of the torso firmly rooted. Use gravity, feel like you have roots in this area, the more you feel gravity, the more you feel your roots, the more the legs will float up.
I suggest that you stay up for five breaths. Please don’t strain. if you are not so strong, stay for less your strength will easily grow.
Continue focusing up through the spine, continue re-affirming the spinal succession, starting at the front of your tail, sending one vertebra up and back, and then the next, reaffirm space between each vertebra opening like a fan.
SOFTEN THE BACK OF THE BODY.
Continue your process of softening between the shoulder blades See how soft you can make that space.
The breath really helps us. Take rich breaths. Your breath well deepen with your practice. it is always essential that we do not force but exercise practice in a way that is appropriate for us.
It is balance between not straining pushing tensing being competitive and on the other hand not being too lazy, being focused. it’s a balance that we all seek to find. The minute you find yourself tensing, or being critical about yourself, let go. It is not helpful.
The first and most important focus on the spinal succession. We keep doing that. At the same time because human beings are amazing and we can multi task.
USE THE BREATH TO DEEPEN THE POSTURE.
Let me be clear when you do this. The arch in the spine with each breath gets deeper. If you feel like your arching is lessening, then you haven’t quite achieved, what we are looking for. Keep searching, keep exploring. It’s fine. It takes us time to realise something. Just be aware that utilising the breath, deepens the arch.
USE BREATH AND GRAVITY
On the in breath we consciously lift the thorax up and back, on the out breath we can think about lifting the feet even higher. This means that whatever part of our torso is on the mat, tis more rooted, more surrendered to gravity. Gravity has an energy, the more we feel the roots, the more we will eventually feel an energy come back to us from gravity, sending us up. This is the ballon that you see when dancers jump and i it looks like they floating the air. It looks like there’s a pause, suspension, before they come down. They are using gravity. We use gravity to go higher into posture.
ROCKING.
Eventually, by practising and exploring this movement of the breath, the movement will turn into a rocking. When you take the in breath, the spinal succession, the lifting our up and back of the rib cage, will take you eventually all the way back to the front of your thighs. And the out breath, as you send the legs up, will bring you all the way to your chin. Let me stress this does not happen through you forcing and pushing, it happens through the spinal succession, and through utilising a rich breath. Be a little patient with yourself. Stay true to the movement and the breath. stay true to not straining or pushing.
THANK YOU
Marina Selini Katsaiti kindly shared these beautiful photos.
She studied yoga with me from her student days, and followed two of my teacher training courses. One was a specially designed dynamic course. You will be hearing more about her in a series I am planning featuring some of my yoga students, and how yoga has influenced their lives.
Marina lives in Galaxidi, Greece.
She teaches yoga, is a university professor, has written a book, as well as writing for several publications.
This information is also Useful for Reiki Practitioners
and Teachers, Cranial Sacral Therapists and other
Body Workers.
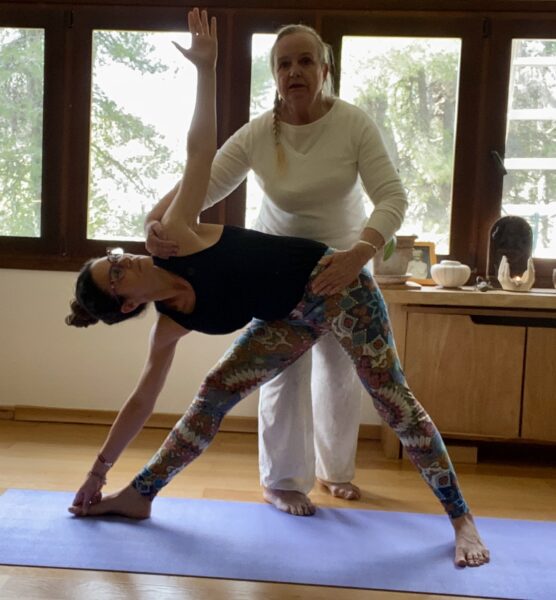
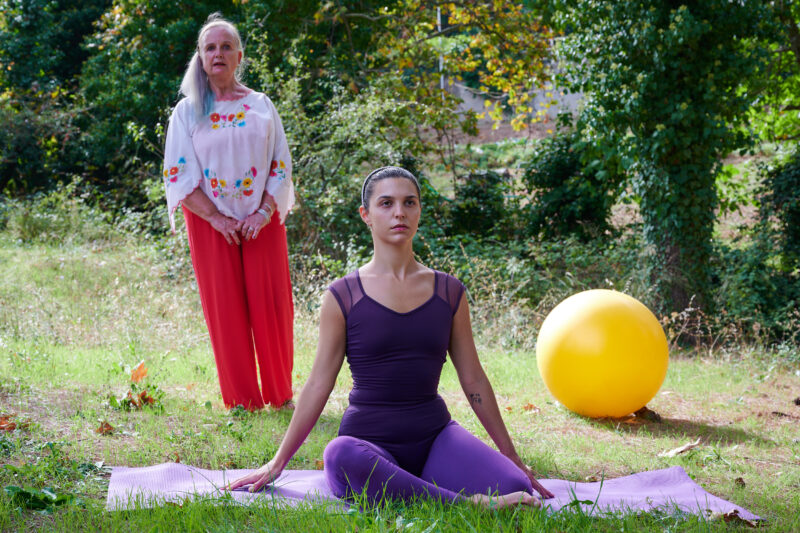
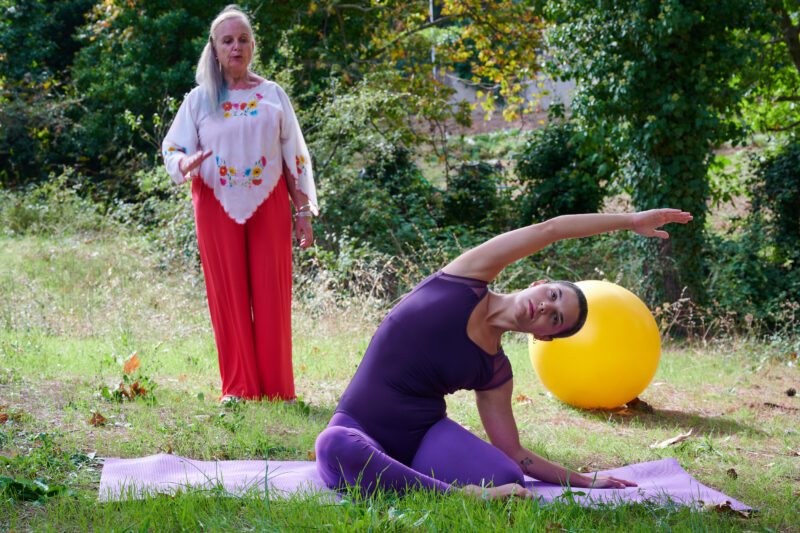
I was so happy to be teaching Marina Selini Katsaiti “live” again!
Touch Corrections from a Teacher and How a Student can Participate and Receive the Full Benefit of an Adjustment.
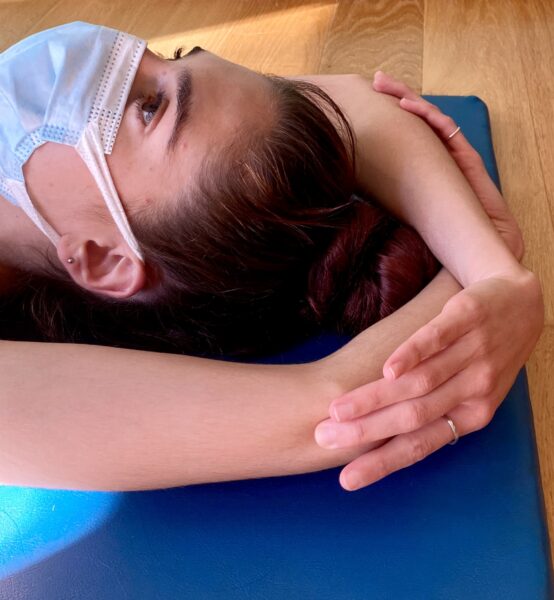
During the pandemic we were often not giving classes “live”, at all, and then, we were exercising with masks, and keeping our distance from one another. It is only recently that we have felt safe and comfortable enough to have “live” classes and, in cases where there is trust, for teachers start giving adjustments again.
Touch corrections help the student to move into completely new spaces in their body. Without them the student may never understand how to move in a certain way or from a certain place. The experience can change, completely, how a student practices.
GETPERMISSION
It is absolutely essential to get the student’s consent before touching them.
Some countries are much stricter than others. You may need a written agreement.
My suggestion is that you use your instincts. It may be that you have a beginner and you see something that can be improved by a simple touch correction. A simple “May I touch you to help you?”is enough. Usually you get to know the student over time and, as you do, a trust is built between you.
Any adjustment needs to be completely ethical.
If you have any doubts, either from your side, or the side of the student, simply abstain from touching altogether.
As dancers (at least in my time) we were used to being touched. I never, ever, had a bad experience. I did have receive some amazing touch corrections that revealed very important things about my body, and my movement, that I had not realised with verbal instruction. Some touch corrections completely changed my practice.
It helps, and I enjoy the fact, that I live in a culture where people touch a lot.
Here are some guidelines.
LOVE
When we touch a person, we touch with love. I do not mean a personal love, and not a sexual love. Love is a quality, just as peace is a quality, that we sense. We can walk into a space and comment on how peaceful it is. I remember coming from work and entering a space where Reiki was being practiced. You could cut the feeling of love with a knife!
The love I am talking about is not personal. It has no expectations. It just is. As we practice having this stance, it is enough to just think it, and it happens.
People often open up and feel safe when they sense an atmosphere of love.
RESPECT
Learning how important it is to soften in the front of the hip joint to free up the base of the spine.
When we touch a person, we always do so, with deep respect. We honour the human being that has given us the gift of practicing and learning together.
Some people really need to feel respected.
A STANCE OF NON JUDGEMENT
Avoid judging. The minute you judge someone they immediately sense it and tense up. It is one thing to help someone to move deeper into a position or make them aware of an area of the body and another to judge. As a teacher or therapist it is important to leave doors to new information open. Once we judge someone it is as if we close the door to further information which may deepen our understanding as to why someone cannot stretch more or do a certain movement.
THERE ARE NO ROLES
Roles cause a sense of separation. We all learn and experience, together, as one. There is no teacher and student, no therapist and patient. We are one.
Yes, as a teacher may be bringing years of knowledge to the space, but as human beings, we are all interconnected, and the student also educates the teacher.
HOW STRONGLY DO WE TOUCH?
If we are drawing attention to an area of the body, or wishing to facilitate the fascia or cranial sacral rhythm, the touch needed is, as light as a leaf falling to the earth.
Do you as a person like to be pushed around? It is the same with our body, touch too firmly and with an authoritarian manner, and the body will react defensively and tense up. If we touch lightly and “listen” to the body, taking the stance we have mentioned above, the body is likely to respond.
If we sense any internal movements happening, it is important to follow those movements as closely as possible, trusting in the wisdom of the body. It will always lead to an unwinding or release.
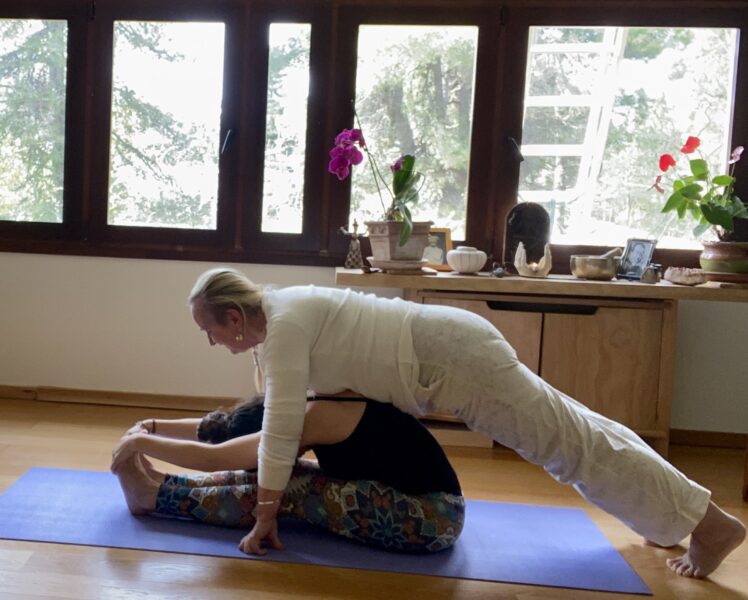
Some adjustments that that we do in Yoga and Pilates may involve quite a lot of firmness, or even using our own body weight. It is essential that the teacher knows exactly what she or he is doing and can, tune into, listen to, the body of the student, and gradually ease his or her body into the desired space.
I control how much of my body weight that I need to help Marina move deeply into her Forward Bend. This adjustment is magic for people who are stiff if it is done in the right way.
There is never any harshness or violence involved, ever. You can easily injure someone if you are abrupt and push.
RELAX YOUR HANDS
When touching someone or touching ourselves. Keep the palms of the hands and the fingers relaxed. Usually the fingers are gently closed in order to focus into the body.
We have energy centres (chakras) in the palms of the hands and on the pads of each finger.
HEALING PRESENCE.
We cultivate a healing prescience. We as teachers and therapists emanate love, openness and respect.
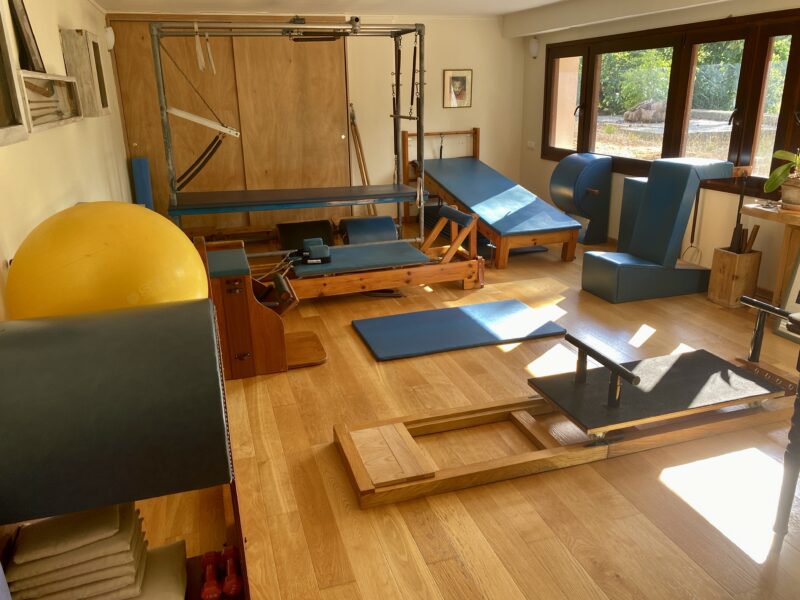
HEALING SPACE
One sunny day at my place. The nature around my space is amazing.
When we step into our Pilates studio, our Yoga Shala, our Reiki Space we are stepping into a space which has gathered the energy, over time, of love, respect, peace, openness……a place of support, learning and healing. When we step into that space we change, we are more present and professional.
Students feel this, of course. My students at Illium, in Kolonaki, described feeling a sense of peace and calm as soon as they entered the front door.
VIRTUAL HEALING SPACES
I have learnt, through the pandemic, and teaching on line, for the first time, that the same sense of love, respect, peace and openness can be created, just as strongly, with on line classes.
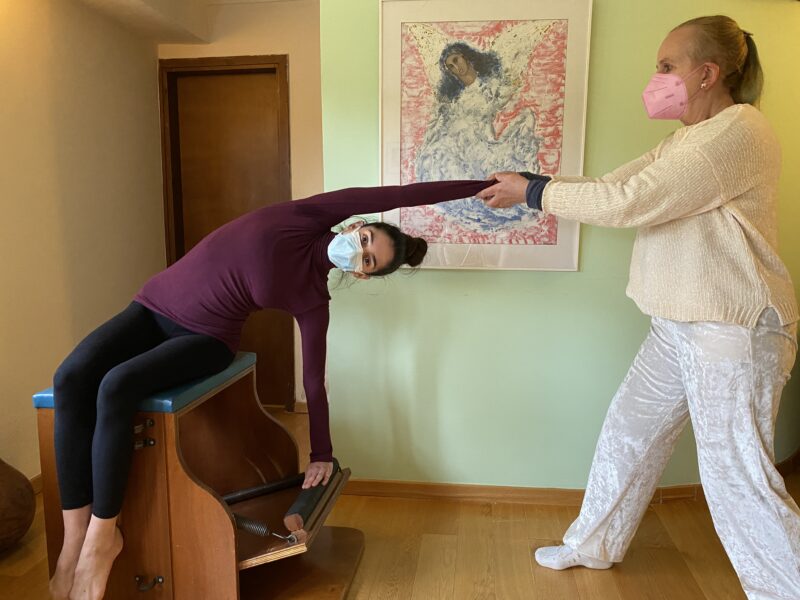
USE YOUR BREATH TO FACILITATE TOUCH
Start matching your own breath to that of your student. This will bring your two energy fields into harmony and balance and can facilitate what you wish to communicate or achieve.
Themis and I are both breathing out here to facilitate her side stretch.
ADVICE FOR STUDENTS
Only allow teachers and therapists who you completely trust to touch you.
Some people may be very nice, well meaning but they are not meant to work with you in this way.
I remember, many moons ago, I had a very sensitive spine, and when I had pain, I would go to my mentor, the late Lena Trifonopoulou, for treatments. One day, a really lovely lady, turned up at Illium. She was a a physiotherapist and she wished to work with us. I would always “audition” people who wanted to cooperate with us. I told her about the history of my spine. I remember she was so nice, she must have given me a little massage etc and she finished the session with a classic series of moves to test the mobility of the spine. Nothing harsh. The next day my back was out. I went to Lena and she started scolding me “Why did you let “anyone” touch you?” I was defensive, I smile remembering it, I said, “but she was so nice”….I learned my lesson.
Lena, on the other hand, could work miracles with her amazing hands and presence.
Once you have made a decision to trust someone in this way, stay as open as possible, as soft and as receptive as possible. Give in, surrender ….breathe and enjoy the ride!!
YOU MAY ENJOY
My You Tube video https://youtu.be/tgfqDcJYb7M of the Spine Roll on the Reformer that includes a variety of touch corrections.
My Reiki 1 Circle which meets live and on Zoom every month.
Ask to be put on my mailing list to receive all the information for each month.
The next Reiki 1 Circle is Saturday 13 May 2023. 18.00 – 19.00.
America and, most importantly, I learnt a lot of the fine details from Jerome Andrews.
RECOMMENDED.
This exercise is good everyone.
PREGNANCY 🙂
Pregnant women who are well exercised can do this exercise until the belly is too big.
LEVEL.
Advanced.
REPETITIONS.
3 – 5.
NOTES.
This exercise is performed in smooth, continuous way. It may be too extreme for those with knee problems. I love this exercise. It is one of my favourites! I love the fact that the whole spine is stimulated. Touching the crown of the head down has a knock on effect throughout all the body’s diaphragms. Keep as round a shape as possible, like a continuous circle and as close a shape as possible.
Themis Andreoulaki. Dancer and Graduate of Refined Pilates Teacher Training.
STARTING POSITION.
Sit in a crossed leg position. In yoga this is sometimes referred to as “Easy Pose”. Take a hold of the big toe by sliding your second and third fingers in between the first and second toes, right down to the root. Bend the fingers around the big toe so that they are holding firmly and are curled towards and meet the thumbs. This encourages the opening of the space between the first and second metatarsal where there are nerve endings that ultimately connect to the sciatic nerve. This is, by itself, therapeutic for the back.
Mostly I see it taught with the right hand holding the left foot and the left the right. The arms are not crossed and the elbows are gently open.
Jerome Andrews taught us to have the arms crossed. This deepens the curl of the upper back even more. You do have to be careful not to lift the shoulders. In a very deep 1st position of the spine or “C” curve, place the crown of the head on the floor in front of you.
BREATHE IN
Feel as though the crown of the head has roots and maintain a feeling of it being pulled down into the earth. At the same time, feel as though the tail bone is being pulled down into the earth in the opposite direction. Think of your tail as being like a sensitive feeler. The front of the body is very soft. Begin sending your awareness along the spinous processes at the back of the spine. Think of each one as being sensitive alive, fluid and sensing. Start at the end of the spine and move up vertebra by vertebra until you arrive at the top vertebra which is behind your nose. Move up in your awareness two steps more, to the centre of the brain and then to the crown of the head ( the part which was soft when you were a baby) which is touching the floor. Allow the curve of the back to deepen. The opening in the back of the lungs on the in breath encourages a even deeper curve.
Continue to have the feeling that the crown of the head to pulled down to gravity, to the earth. Begin, at the same time focusing in the very tip of the base of the spine (remember it is sensory) and let it travel towards the floor. This may seem like a long journey to you! Don’t be temped to hurry. It is worth the wait. Very simply the energy of the tip of the tail surrendering to gravity is so great it rolls you back vertebra by vertebra, traveling along and sensing the spinous processes. You will feel a powerful opening, energising and sensitising of the spine. If you have a tendency to be stiff in the lower back and you are careful to take this two way energy as far as you can you will be rewarded with a good opening there. It is vitally important for any tension in the hip joints to be absent. Roll all the way back onto the back of your neck. The knees come to the floor. The feet stay close to the buttocks.
BREATHE IN
Stay up in the stretch and lightly change the legs. This movement is like quick silver and tests if you are relaxed in the hip joints.
BREATH OUT
Roll starting back from the the very first vertebra of the cervical spine. This time feel as though you do not wish the knees to leave the floor to increase the stretch. Roll back vertebra by vertebra, spinous process by spinous process, until crown of the head touches the floor.
The diaphragm has the largest concentration of fascia in the body. Releasing the natural movement of the diaphragm allows us to breath deeply and easily, with the many positive consequences that breathing well brings. Breathing is a natural massage and stimulation for all the organs of the body.
Releasing the full movement of the diaphragm is good for all of us, but it can dramatically change, for the better, conditions such as kyphosis, scoliosis and common neck and upper back tension.
RECOMMENDED.
This exercise is really important for everyone and highly recommended for those who have a problem breathing deeply, kyphosis, scoliosis and neck and upper back tension.
I have noticed that many people have not had the experience of how the body feels, internally, as they breath. This exercise helps them to become aware of the action of the diaphragm and to be more in touch with the internal mechanism of breathing. I find people breath much more effortlessly once they understand this missing piece of the puzzle.
REPETITIONS.
1 set.
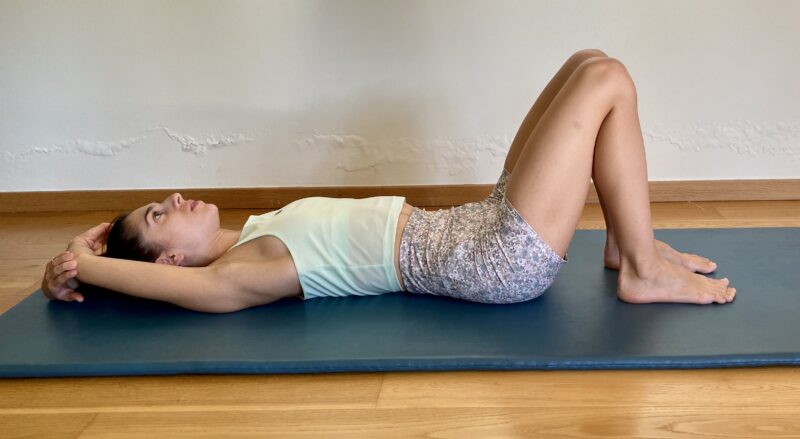
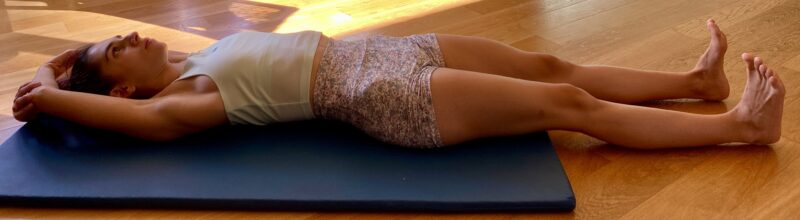
STARTING POSITION
Themis Andreoulaki. Dancer and Refined Pilates Teacher. Graduate of my Refined Pilates Teacher Training.
Bring the arms above the head and bend the elbows. The right middle finger accesses the fascia through the skin just below the left elbow. The left middle finger touches the skin just below the right elbow. The arms are on the floor. Remember to really surrender the weight of the upper back into the floor. It helps to imagine you are floating on your back in the sea or falling backward onto a comfortable feather bed. Imagination is powerful ia a powerful tool. Use it.
PART 1
BREATHE IN
BREATHE OUT
Keeping the left hip still, it is your anchor, lengthen, or stretch, between the left hip and the left elbow. We need to be gentle if we wish the body to respond. The reason why the middle finger is used is to access the fascia The amount of pressure we use is about the weight of a leaf falling to the earth. No more. Ask yourself if you respond well if someone pushes you! It’s the same with your body, it doesn’t like you to push it around. Use enough pressure so the body will cooperate you, otherwise it’s resistance kicks in.
Be careful that you do not go into a side bend. You maintain your sense of axis. It is as if you wish to un-stick your last rib.
STRETCHING EFFECTIVELY.
When we want to stretch an area of the body there is a still and stable point. In this case it is the hip joint. Then there is a post that we pull from. In the exercise this is the middle finger accessing the skin below the elbow. Whatever is in between, muscle tissue, bone is as relaxed and passive as possible AND surrendered to gravity. We allow an opening a stretch to happen and each time we repeat it it will be different because the body has already opened up.
Repeat on the other side.
Repeat the whole thing 3-5 times.
PART 2
Flex the left foot.
BREATH OUT
Slide the heel down so that the leg straightens. Make sure that you keep strictly to the leg alignment. Continue to surrender the weight of the back body to gravity. You should feel a gentle pleasurable “opening” in the Psoas and the front of the hip and thigh.
Leave the left leg straight and stretch the right leg down in the same way.
PART 3
Stay in this position with the arms above the head and the legs straight down.
Take a deep breath in, filling the back of the lungs. The breath should be full but without strain. As you breath in visualize the diaphragm traveling down towards the pelvic floor like a lift in a lift shaft. It does not go front or back, neither does it go side to side, it just travels straight down. Remember the diaphragm is centered in the body at the level of the base of the rib cage.
On the out breath, which is long, slow and complete simply stretch the head up in one direction. You can imagine a golden thread extending from the crown of the head and being pulled back. Imagine the three points of the heels being pulled down in the opposite direction.
Repeat 3-5 times.
Relax the arms down, beside you, allowing the palms of the hands to go towards the ceiling and notice how you feel.
NOTE
Try doing the abdominal exercises after the diaphragm exercise. I think you will find them more effective.
I first was introduced to the Armchair as a dance student, in the basement Pilates studio at The Place in London. The home of the London School of Contemporary Dance.
I was sent down, by Jane Dudley, to study Pilates, after injuring my back. The studio became a safe haven. A quiet, friendly place, run by Alan Herdman who was assisted by Frances Rider. I was lucky to be able to attend classes every day and to observe and help (eventually) initially in exchange for cleaning the studio. I wasn’t very good at cleaning so very quickly the arrangement was changed to, classes in exchange for assisting. It was very competitive at the school and naturally as young dancers we were very concerned about honing our technique.
I remember my first impressions when I first walked into the studio. I was taken aback. It was not at all what I expected. The equipment, especially the Cadillac, looked like torture instruments. I was very shy, but Alan was charming, with a wonderful sense of humour, and I felt welcome.
Talking of Alan’s sense of humour. I remember him teaching me how to teach the supported Jackknife on the Reformer. He was the student! I remember that he made so many deliberate mistakes (many I had already witnessed) and that we ended collapsed on the floor in fits of laughter. Thank you Alan. You were amazing, and so kind.
The Arm Chair was on one side in the studio and I remember teaching the non dancers the exercises. I did them too but without thinking about them too much.
Fast forward to when I had my own studio in Athens, Greece. Frances (yes the same Frances Rider) was in and practicing on my Armchair. She said “Oh these exercises are so wonderful.”
Inside myself, I thought, “Really?”. I taught them, often, and I knew they were good for strengthening the upper back and the arms, for scoliosis, for kyphosis, for people with neck problems but they did not excite me.
I reckon it took my 10 years to fully appreciate these exercises. 10 years to realise how the slope backwards helps you to really connect with the muscles in the upper back. 10 years to realise how to use the support of the springs to free the true length of the arms. And even later how much the breath can be utilised. Finally I understood Frances’ comment. I am so happy. Now I LOVE my Armchair.
In 2013 I had to have a mastectomy, due to breast cancer. This resulted in my left shoulder being stiffer. Afterwards 2 years of treatments, I had plastic surgery which involved removing part of my back muscle on the left. I am very happy and grateful that I had the surgery. It had a positive psychological effect. It did leave a physical imbalance. My left shoulder is stiffer and it it is harder for me to raise my left arm. I take anti cancer medication which causes weight gain and, in my case, numbness, stiffness and has negatively affected my joints. Of course this had a knock on effect and my neck gets stiff and, sometimes, painful especially as with the pandemic I spend much more time at the computer!
I am not telling you all these things to make you unhappy or to complain, but to tell you Pilates has helped me generally with these challenges. I can say with confidence I do feel better after exercising.
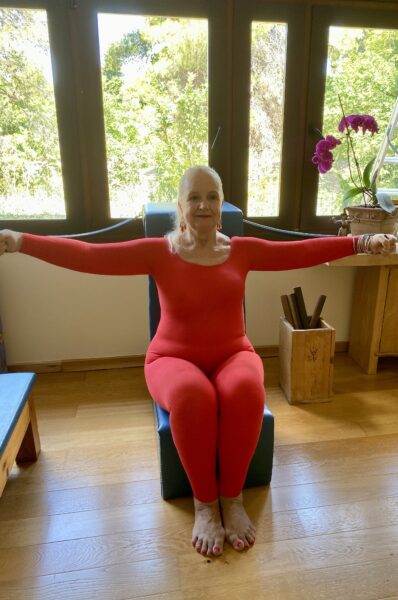
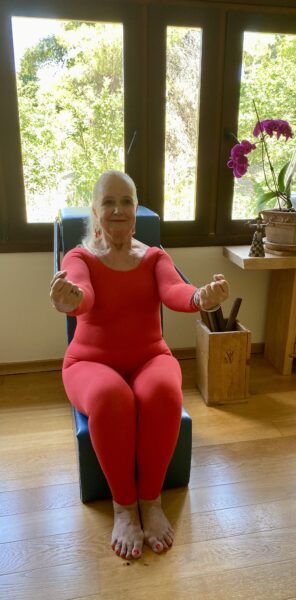
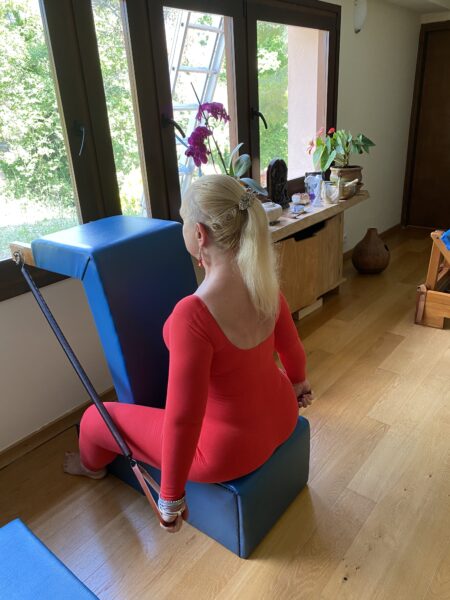
The exercises on “The Armchair” afford me the support from the springs that aid me in increasing my range of shoulder and arm movement. The design of the chair with it’s backward slope helps me get more in touch with my back body, the back of the lungs and breath as support for the arms, as well as the shoulder blades.
I can no longer do the exercises perfectly, but that is not the point. The point is to go through the process, in a relaxed way, focusing on the details of how you do the movement and utilise the support. Each repetition will be and should be different, and it will be better than the one before. The body opens up, becomes pain free and moves with ease.
This is true for me just as it is true for those who have greater physical challenges than me as well as those who rely on there bodies being very finely tuned, dancers, athletes…..“The Armchair” exercises are good for all of us. They really help people that have scoliosis and kyphosis.
I will be sharing some of the details of how to get the most out of these exercises in future, blogs, posts and videos.
The fourth spinal succession has to do with lateral bending.
The Mermaid is the perfect exercise to explore this.
MERMAID.
RECOMMENDED.
This exercise is good for everyone. The starting position may sometimes bother those with knee problems but you do have more than one starting position to choose from. Hopefully one will suit the student.
PREGNANCY 🙂
Pregnant women can do this exercise throughout their pregnancy. At a certain point when the belly gets larger it is better to sit cross legged or in the second starting position.
LEVEL.
Intermediate.
REPETITIONS.
3 – 5 on each side.
NOTES.
This exercise is performed in smooth, continuous way, with flow. The breath is always just as important as the movement.
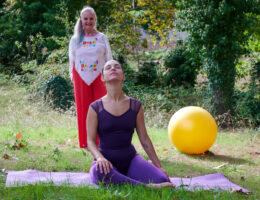
Jenny with Pilates student and dancer Ariadne Kitsou
STARTING POSITION.
Sit on the left hip with both legs bent. The knees are pointing forward and form a zig zag. Relax in the right hip and lower it to the floor. Have the spine long and proud. The pelvis is square to the front. The arms are at the sides of the body, gently rounded as if framing the body.
There is an alternative starting position which is called 4th position in contemporary dance. This is the position shown in the picture. Sit on the left hip. Both knees are bent but this time the front leg is bent at a 45% angle and the shin bone is parallel to the front of the mat. The right knee is bent inwards and goes behind the body. Once again relax in the right hip and has far as possible lower it to the mat. The pelvis is square to the front. The arms are at the sides of the body, gently rounded as if framing the body.
Your focus is in the *middle body.
The arm can come a little closer to the ear.
BREATHE IN. Being careful not to hyper extend the elbow, feeling the support of the left lung and shoulder blade, raise the left arm to the side and above the head in a wide, graceful arc. Keep the shoulder soft, slide the shoulder blade downwards without strain and bring the arm as close as possible to the ear. Make sure the hand and fingers have shape but that they are not tense. Once there is tension in the hand and fingers there will be tension in the shoulder. Feel the fingers extending out into space. Feel the sit bones rooted and the crown of the head lengthening to the sky.
The arm could come closer to the ear.
BREATHE OUT. Lengthen the spine, keep the left hip rooted to the floor and lifting up and over, bent the spine to the right. Keep the body on one plane, this is just a lateral movement which means both shoulders will be flat to the front. The head moves as a continuation of the spine. Think of the crown of the head as being the last vertebra. At the same time the right elbow comes to the mat directly under the shoulder joint. The forearm and the palm of the hand are parallel to the front of the mat.Make sure the underneath arm does not block your stretch. Slide it further out if you need to. Feel as though the fingertips and the crown of the head are being drawn out into space.The side of the body facing the mat should soften and condense in order to allow the the stretch in the side of the body facing the ceiling.
BREATHE IN. Stay in the stretch. Feel of the side of the ribs, facing the ceiling, filling with your breath.
BREATHE OUT. Deepen into the stretch by relaxing where you feel a resistance or pulling and surrendering the torso and arm to gravity. Remember to keep the opposite hip grounded. Imagine the side of the spine facing the ceiling and how the spaces in between each the vertebrae will be open like a fan.
BREATHE IN. Roll back up vertebra by vertebra, starting, truly, from the very base of the spine, the tip of the coccyx. You place one vertebra on the other as you move up. This is the fourth spinal succession. As you come up have a picture in your head of where you will return to. You will return to your axis feeling the sit bones like they have roots going deep into the earth and the crown of the head lengthening up into space.
BREATHE OUT
Open the arm to the side and bring it down beside you.
*Middle Body. Imagine your body as if it were in 3 slices. Front body, back body and between those is the middle body.
When I first did the lunges and some similar exercises on the Wunda Chair I was very impressed by how it automatically engaged me with the pelvic floor and my axis..
ALIGN THE BONES
Precisely align the bones. Geometry is sacred. Aligning the bones makes the movement effortless. The muscles and fascia follow the bones effortlessly and naturally. You will never injure yourself this way.
I have found it very effective to explore, moving, as if I were just made up of bones. It can put you better in touch with the skeletal system.
ALLOW THIS MIRACLE, THAT IS YOUR BODY, TO INFORM YOU.
Rather than acting like a dictator, open yourself up to listen to your body.
Experience sensation fully.
LINES OF ENERGY.
Imagining lines of energy helps the body understand where it should move to. Using your imagination is a powerful tool.
GIVE YOURSELF SPACE.
Personally I find that when people imagine they have a huge amount of space, their spine lengthens. Movements have more generosity and freedom.
EXPLORING IS FUN.
Being curious about how far the body will go is joyful.
BREATHE
Let the breath take you like a piece of music moves you. Practice breathing just a little ahead of the movement and then allow the breath to colour all of the movement.
There are many ways of breathing, all valid, and all serving a different purpose.
HAVE FUN FLOAT UP.
The springs are there to give you support. The equipment is designed to be your best friend. Go with it, play with the support and see what it will do for you.
EQUIPMENT SET UP.
One spring up and one down.
REPETITIONS
3-5 on each side.
Always do the same repetitions on each side. If you do three on the right do three on the left, even if you you feel the one side is stronger. It is a matter of balance.
SET YOUR INTENTION.
What is it you would like to learn about your body in this exercise today. It may be something as simple as, “Today I will not tense my shoulders” or “Today, my legs are perfectly aligned throughout. Or “Today I will feel plenty of space around me.”
Themis Andreaoulaki. Dancer and Refined Pilates Teacher Training Graduate.
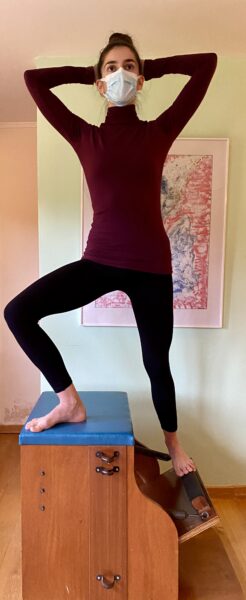
STARTING POSITION.
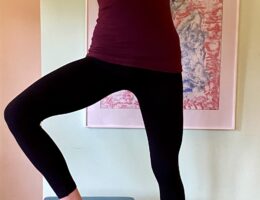
Stand sideways to the chair. Take the bar down with the foot, let’s say this is the right foot, that is nearest to the chair. Mount the chair. Have the inside foot on the wooden part and the align the left (outside) foot along the bar towards the back corner. Place the right (inside) foot on the top of the chair at 45’ angle, the toes towards the front, furthest corner. The exact positioning of the feet will depend on the flexibility of your hips. Bring your axis, your spine (on the line of gravity) between your legs. Bring the triangle of your pelvis ( the front of the two iliac crests and the pubic bone) so that it is on one plane and facing directly front. You may need to release in your hips to achieve this.
Feel energy rising from the toes, up through the pelvic floor, up through the spine and out through the top of the head. This energy draws you upwards. You are subtly aware of the left foot on the bar. It never leaves the bar. There is a contact with the bar that lightens as you go up.l
The right foot imprints down powerfully and the leg engages strongly. The pelvis remains facing front.
Themis Andreaoulaki. Dancer and Refined PIlates Teacher Training Graduate.
BREATHE IN
Smoothly, descend with a sense that the crown of the head continues to be drawn out into space.
NOTES.
It is nice to come to a balance, with the leg extended to the side, on the top of the chair at the end of each set. Make sure you straighten the knee.
Medium Support. On my Wunda Chair, one spring up and one down is good.
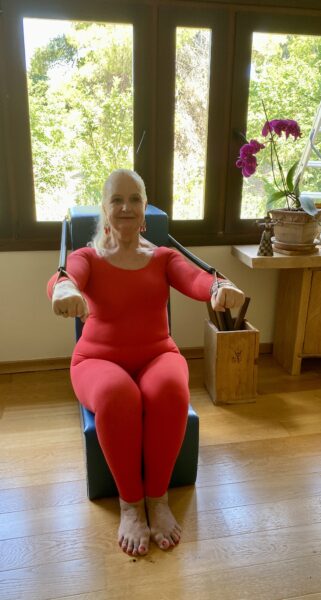
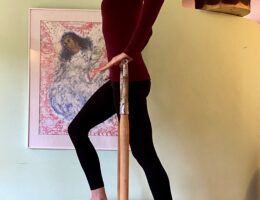
The exercise can be done with, as shown in the photos, or without the poles.
The poles afford a very light and subtle support. They are not meant to be leant on!
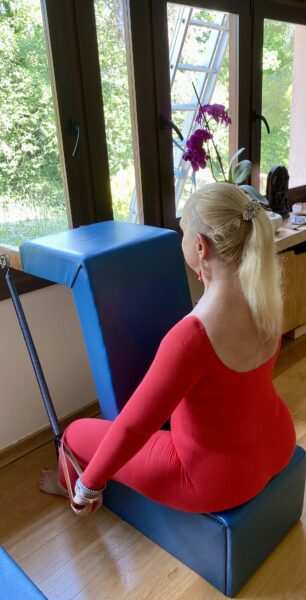
Themis Andreaoulaki, Dancer and Refined Pilates Teacher Training Graduate. Starting Position.
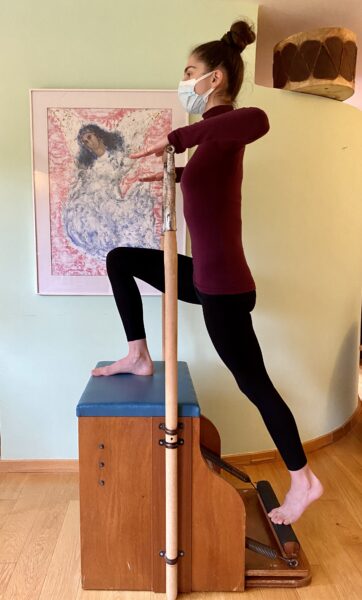
STARTING POSITION.
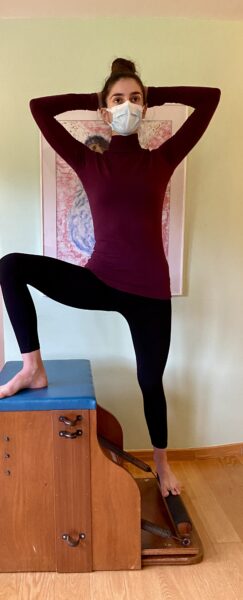
Stand facing the bar. Place the hands on the handles for a modicum of support. Press the bar down with the toes of the left foot. Mount the bar. Place the right foot, in parallel, on the back edge of the seat of the chair. Softly spread and lengthen the toes. The knee is bent and the knees cap is in a straight line with the space between the first and second toe. The left leg is straight, the toes are spread and are on the bar. The heel is soft. It is in, what dancers call, “demi relevé”. The front of ankle is soft. The foot stays in this position throughout the exercise. The left leg is in parallel.
Think of the bones that form your pelvis and bring your pelvis so that it is centered between the legs. Bring the iliac crests in a line. This will probably involve softening in the hip joints. Make sure the triangle of the pelvis ( the two iliac crests and the front of the pubic bone are in one line. This will usually mean an enlivening of the pelvic floor, the engagement of the deep abdominals and an allowing of the coccyx to be free and hang. The spine in in the second position (see my blog) https://jennycolebourne.com/second-spinal-succession-and-position-for-refined-pilates-and-yoga/ or naturally straight, with the curves present.
The palms of the hands are placed on the top of the handles. They very softly push down for support. Use the support, soften your shoulders and gently widen between the elbows. The collar bone is open.
If you do the exercise without the help of the poles you can extend the arms to the side, or have the left arm forward and the right to the side.
Having the left arm forward reminds you to keep the left hip forward.
It is important to sense the extremities, to feel the toes at all points of the exercise, and their contact with the bar, and the crown of the head actively lengthening upwards.
BREATH IN
Feel the air traveling into the back of the lungs. Lengthen the ribs away from the hips to create more space.
BREATH OUT
Feel the toes on the bar, it is as if an energy rises from there, connect the pelvic floor, in your mind’s eye feel the that energy rising up through your axis and out of the crown of the head. It is as if the crown of the head is being drawn out up to the sky. It almost feels as if you are being pulled upwards and out into space.
Feel the right foot very firmly on the seat of the chair. Feel gravity and press into it (be extremely vigilant about the foot alignment).
Allow the springs to lighten. They help draw you upwards.
Themis Andreaoulaki, dancer and Refined Pilates Teacher Training graduate at the top of the movement.
BREATH OUT
Leave the crown of the head where it is and gently and smoothly lower the bar.
NOTES
Keep the two iliac crests facing front throughout.
You can come up into a balance on one leg (arabesque), on the seat of the chair, either each time, or on the last repetition.
On my hand made (before commercial machines) Wunda Chair, the best setting is to have one spring up and one down.
Look for medium support on your Wunda Chair.
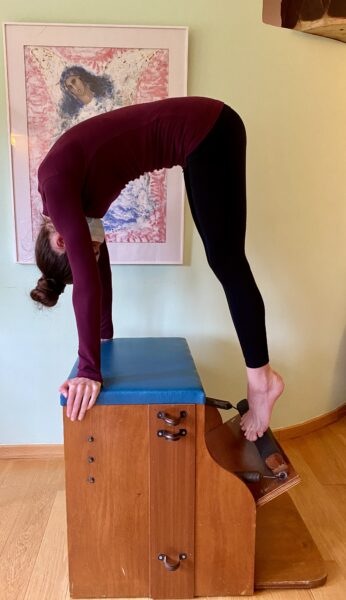
STARTING POSITION
Face the the seat of the chair.
Place the palms of the hands on the back corners of the seat. The fingers are facing outwards. Keep all your fingers together. There is a little bit more weight on the little finger and the outside edge of the arm.
The elbows are very slightly bent. It is important to avoid hyper extending the elbows. You should feel the connection between the arms and the upper back.
Spread your toes, particularly between the big toe and the second toe, and place the toes of one foot on the bar and press it down. Mount the bar with the other foot, spreading these toes as described. Have the feet and legs closed, straight and in parallel. Be careful not to hyperextend the legs. The legs should feel like 2 columns of energy. An alternative is the “V’ position, with the legs moderately turned out. I am choosing this position because it is easier to be sure of the leg alignment. See my blog GOOD LEG ALIGNMENT IS ESSENTIAL FOR EVERYONE
It is a position which makes it easier to release the lower spine.
Shift your body weight and bring the shoulders directly over your wrists.
Make sure the shoulders are relaxed and down away from the ears.
The weight of the head is surrendered completely to gravity and is in a position where you can look at the legs through the exercise “spot” the leg alignment.
Themis Andreoulaki. Dancer and Refined Pilates Teacher Training Graduate. The highest point of “The Pike”
BREATH OUT.
Feel the toes, especially the big and second toes if you are working in parallel. Sense an energy passing up through the inside of the legs and engages the pelvic floor This energy passes through the back of the spine, spinous process by spinous process, starting at the coccyx and arriving at the atlas, and out the top of the head in a long arch, as you move.
The weight of your body transfers more and more onto the arms and you feel the support of the shoulder blades.
Allow the springs to lighten and help you, allow yourself to be carried up. Without losing the First Position of the spine, think of sending your sit bones high to the ceiling.
BREATH IN
Feel as if you fill the back of the lungs with air. Breathing in this way will deepen the position of your spine.
Reverse the spinal succession, following the back of the spine from the atlas to the coccyx.
Lower the bar with moderate speed.
Themis Andreoulaki. Dancer and Refined Pilates Teacher Training graduate. The starting position of “The Pike”.
REPETITIONS
3-5
Breakdown of repetitions.
How does my body feel, today, right now, as I do the exercise. Notice using the knowledge that I have, what can I do better?
I apply my knowledge and refine what I am doing.
According to my teacher, Jerome Andrews, number 3 is perfect!
I hone my concentration and see if I can do the exercise better than my previous best.
All the above applies. What can I do even better.
NOTES
I have chosen an out breath to go up. As we breath out the diaphragm travels up internally leaving more space for the engagement of the pelvic floor and the hollowing of the abdomen as our spine deepens it’s position.
Breathing in on the way down gives a sense of suspension.
It can, of course be done the other way round, just as effectively, and slightly adjusting the focus.