FOOT WORK
VARIATION WITH THE LEGS IN PARALLEL IN “HIGH RELEVÉ”
(ON THE TOES WITH VERY HIGH HEELS)
SPRINGS.
On my Wunda Chair, which is hand made, I use the combination of one spring up and one down. I have three positions to choose from. Look for a moderate amount of resistance on your Wundq chair. A resistance that gives you the support that you need but is not so strong that you cannot take care of the finer details of the movement.
LEVEL
The Wunda Chair Foot Work is more challenging than the Foot Work on the Reformer because you need to maintain the axis of the spine without the support of the carriage. For this reason I would class it as an intermediate level of exercise. I recommend you first try the exercise under the guidance of a good and experienced teacher.
REPETITIONS.
10 times in each position.
SUITABILITY.
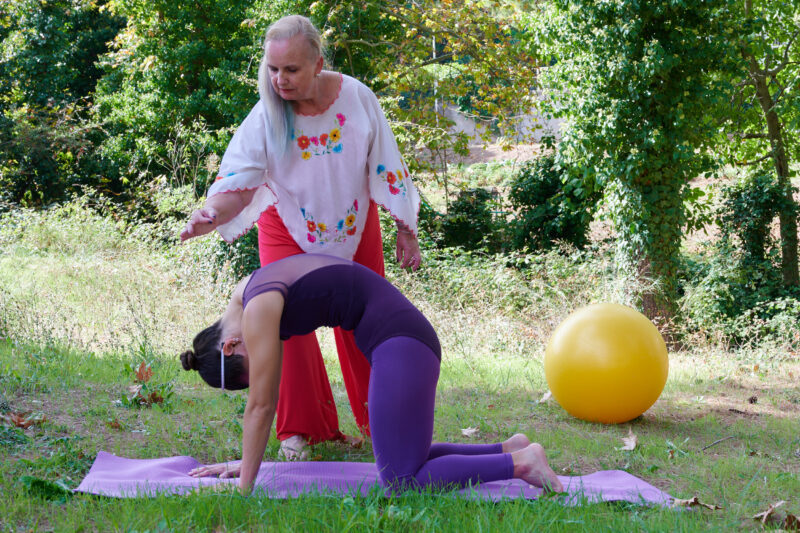
The exercise is suitable for most students of all ages, including those with scoliosis, kyphosis and lordosis. It is a great way to do “Leg Work” when you are pregnant. You may need to open the feet, hip width apart, in the later stages of pregnancy. And, of course, the exercises are great for after you have given birth. Many people who have hip, knee and ankle problems can successfully do these exercises if they take good care of their leg alignment. Please refer to my blog…
BREATH IN.
Breath in feeling as if you fill the whole of the back of the lungs with air, every cell. Imagine that the air is expanding all of the area from the to of the shoulders down to the last ribs. If you think about how large the lungs are it gives you a great sense of support.
Start the in breath slightly before the movement, as if the breath initiates the movement and then have the breath accompany the movement, lasting as long as the movement.
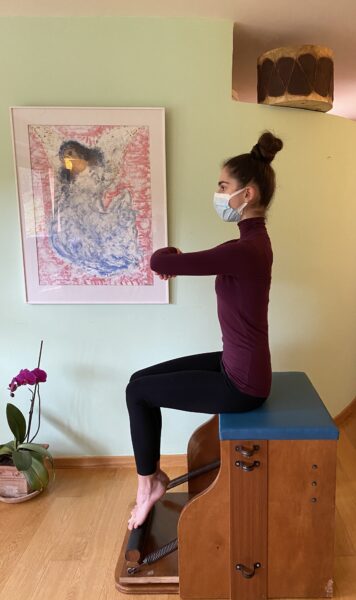
THE IMPORTANCE OF THE TOES AND THE FEET AS SITES OF SUPPORT.
Spread and lengthen the toes and place them on the bar. Emphasise the opening of the space between the first and second toe. The feet are together. Lift the heels very high, relax the back of the ankle to allow the heel to lift and make sure that you keep the heels together. Sense all the toes against the bar. Press with all of the toes but press more with the big and the second toes This is your site of support. At the same time engage the muscles of the pelvic floor press the bar down. Take it down only as far as the spine remains in a state of balance, on it’s axis. Be careful you don’t move forward, at all towards the legs. It does not matter if the bar goes all the way down or not.
As you press the bar down, in this way, you will feel the spine lengthen automatically even more. Feel as though the crown of the head moves up in the opposite direction to the movement of the legs, to the ceiling.
BREATH OUT.
When you breath out, empty the air completely for the lungs. (There is no need to push as you do this.) During the out breath the abdomen naturally moves inward, take advantage of this natural impulse and relax the abdomen into the inside edge of the spine. If you are too tense it does not happen and you loose this support and a lot of energy unnecessarily. Match the speed of the out breath with the movement. The movement is slightly slower than the pushing down.
Let the the springs bring the bar up. In the meantime focus on softening very deeply infant of the hip joints and maintain the length in the spine. Make sure the ankles remain in the same position.
THE THORAX AND THE DIAPHRAGM ARE RELAXED THROUGHOUT.
The thorax simply floats directly above the bowl of the pelvis. A very common correction is to put the ribs in but this simply creates tension in the diaphragm which in turn blocks the effortless, deep breathing which is such an essential part of each exercise. Looking from above you would see the head floating directly above the shoulder girdle, the shoulder girdle directly above the thorax and the thorax above the pelvis. One on top of the other. It is a state of balance.
The diaphragm is free to move fully creating free, full breathing and a beautiful massage for all the organs of the body and the spine.
WITH EACH REPETITION YOU GET TALLER. THIS IS SOMETHING CLEARLY VISIBLE AND NOT IMAGINED.
STARTING POSITION.
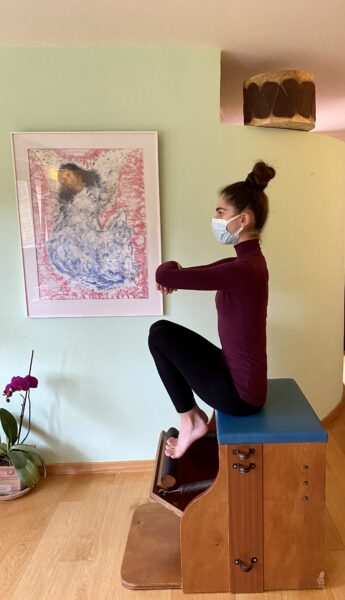
Sit on the chair facing towards the bar. The spine is on it’s axis. Sit in the middle of the seat. The closer you sit to the front edge of the chair the more challenging the exercise. You can try this as you get more advanced.
PLEASE CONSULT THE NOTES ON THE FOOT AND LEG ALIGNMENT in my blog https://jennycolebourne.com/good-leg-alignment-is-essential-for-everyone/
The arms can be in the following positions:
1. Straight with soft elbows on either side of the body, forming a frame for the body.
2. Cossack arms.
3. Holding a stick, magic circle or ball in front of the chest.
The last two variations can be useful, in that your teacher can have a clearer view of what happens to the spine during the exercise. Or you can check yourself in a mirror.
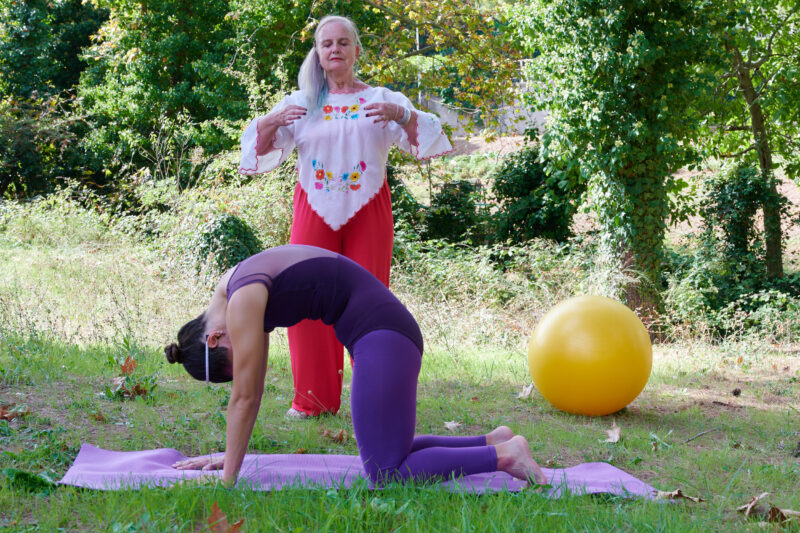
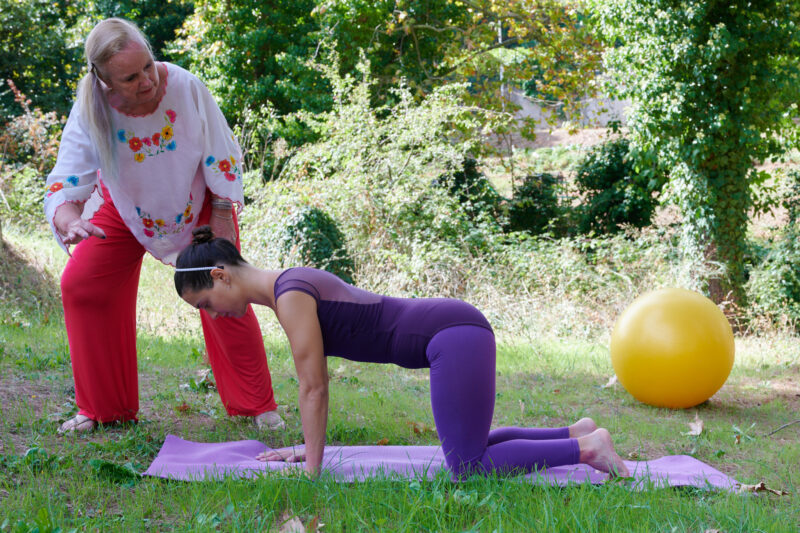
“COSSACK ARMS” DETAILS
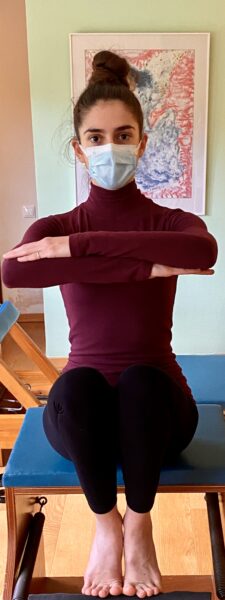
I have chosen “Cossack Arms” for the photographs. Here are some details of how to maintain this position with grace and ease.
Imagine that your collarbone is twice as wide as what you see. Very subtly send the shoulder joints slightly back of the collarbones. You may feel your shoulders blades glide a little closer. The arms are parallel to the floor, imagine they are supported by water and this should help you not to gather tension in the shoulders. The middle fingers hold on to the skin just above the opposite elbow.
Make sure that you feel the breast bone is wide. There is a sense of subtle opening between the breast bone and the ribs. At no point does the breast bone drop or close.
FINDING YOUR AXIS AND A LONG SPINE
Make sure you are sitting directly on your pelvic floor. If you find this hard you may wish to put a firm cushion under your sit bones.
Imagine the pelvis from underneath, the pubic bone, the sit bones and the tip of the coccyx. Sit directly on top of this space.
Imagine a line extending from they center of the pelvic floor down into the earth. This line also travels up and leaves out of the crown of the head. This is your axis. It is an imagined line of energy. The spine maintains it’s natural curves which touch this line at different points. The spine feels light and long almost as if it were hanging from the crown of the head.
SECOND POSITION OF THE SPINE
According to Jerome Andrews, Pilates referred to the straight spine as the second position of the spine. See my blog on the Second Position of the Spine.
Focus into the center of the spine.
If you think of the body as having three “slices”, front, middle and back. Be in touch with the middle body.
THE PELVIC FLOOR AND THE INTERNAL ABDOMINAL MUSCLES.
Support your elongated spine by energising the pelvic floor. This is not a tightening but rather an almost archetypal energy which moves up through the body and which engages and connects with the internal abdominal muscles through a fascial connection. The abdomen is pulled into the inside edge of the spine. Each out breath helps us increase this sensation.
BREATH IN.
Breath in feeling as if you fill the whole of the back of the lungs with air, every cell. Imagine that the air is expanding all of the area from the to of the shoulders down to the last ribs. If you think about how large the lungs are it gives you a great sense of support.
Start the in breath slightly before the movement, as if the breath initiates the movement and then have the breath accompany the movement, lasting as long as the movement.
THE IMPORTANCE OF THE TOES AND THE FEET AS SITES OF SUPPORT.
Spread and lengthen the toes and place them on the bar. Emphasise the opening of the space between the first and second toe. The feet are together. Lift the heels very high, relax the back of the ankle to allow the heel to lift and make sure that you keep the heels together. Sense all the toes against the bar. Press with all of the toes but press more with the big and the second toes This is your site of support. At the same time engage the muscles of the pelvic floor press the bar down. Take it down only as far as the spine remains in a state of balance, on it’s axis. Be careful you don’t move forward, at all towards the legs. It does not matter if the bar goes all the way down or not.
As you press the bar down, in this way, you will feel the spine lengthen automatically even more. Feel as though the crown of the head moves up in the opposite direction to the movement of the legs, to the ceiling.
BREATH OUT.
When you breath out, empty the air completely for the lungs. (There is no need to push as you do this.) During the out breath the abdomen naturally moves inward, take advantage of this natural impulse and relax the abdomen into the inside edge of the spine. If you are too tense it does not happen and you loose this support and a lot of energy unnecessarily. Match the speed of the out breath with the movement. The movement is slightly slower than the pushing down.
Let the the springs bring the bar up. In the meantime focus on softening very deeply infant of the hip joints and maintain the length in the spine. Make sure the ankles remain in the same position.
THE THORAX AND THE DIAPHRAGM ARE RELAXED THROUGHOUT.
The thorax simply floats directly above the bowl of the pelvis. A very common correction is to put the ribs in but this simply creates tension in the diaphragm which in turn blocks the effortless, deep breathing which is such an essential part of each exercise. Looking from above you would see the head floating directly above the shoulder girdle, the shoulder girdle directly above the thorax and the thorax above the pelvis. One on top of the other. It is a state of balance.
The diaphragm is free to move fully creating free, full breathing and a beautiful massage for all the organs of the body and the spine.
WITH EACH REPETITION YOU GET TALLER. THIS IS SOMETHING CLEARLY VISIBLE AND NOT IMAGINED.
VARIATIONS.
- Toes, heels and knees together with the ankles in a soft relieve 9 the heels slightly lifted.
2. The feet apart in parallel with the heels in a line with the sit bones. (In this version it is easier to maintain the spinal axis.) Small balls or cushions can be placed between the ankles or between both the ankles and the knees. These aids should be used with care. Make sure they do not, in any way, interfere with the alignment of the legs but help bring an awareness of leg alignment, the inner edge of the leg and the connection with the pelvic floor. The purpose is not to squeeze them, just enough pressure should be used to not loose them.