You are looking for
Showing 14 Result(s)
Blog, Illium Center of Light

GOOD LEG ALIGNMENT IS ESSENTIAL FOR EVERYONE

Leg alignment is one of the most important things that you can learn in terms of injury prevention and in helping those who already have knee and back injuries.

Good leg alignment is essential for everyone. It is super important for dancers, athletes, those with knee problems and back problems.

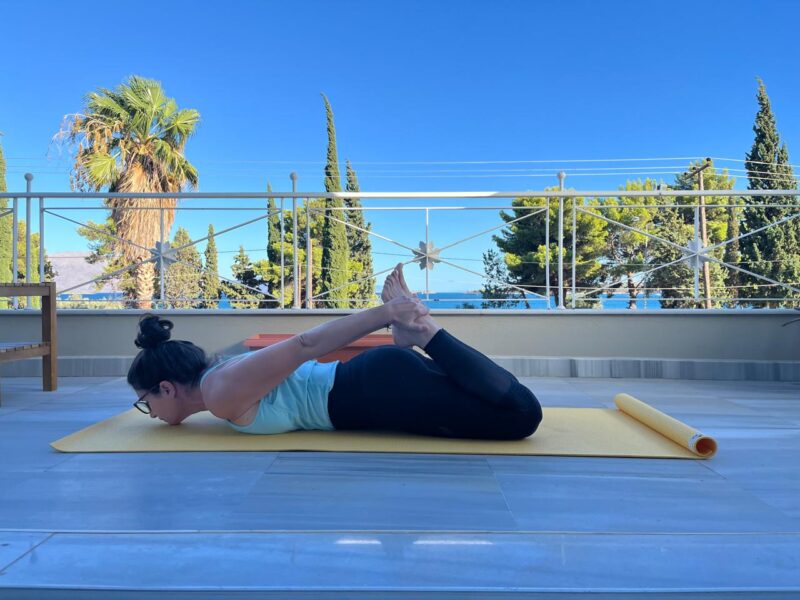
 PRACTICING THE EXERCISE ALONE 

You can do this exercise by yourself with good results. It is nice to practice with a teacher or a friend. Follow the instructions as if you are both student and teacher. You will need to use your imagination (which is a powerful tool) and observe your body carefully. You will not be able to reach to touch all the places mentioned. Define your kneecap with one hand and place the other hand on your sit bone to help yourself have a sense of the architectural lines.

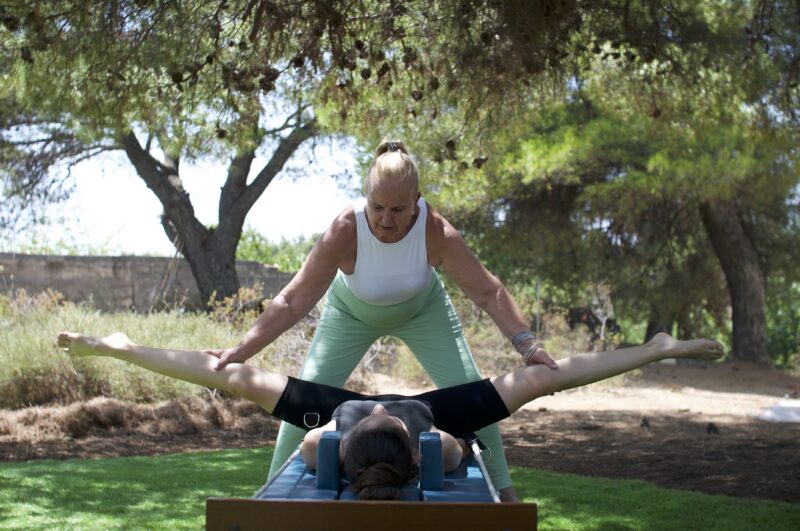
PRACTICING AS A TEACHER/HELPER

When teaching this, presence and a good sense of touch is essential you also need to really take as much time as it needs. This time is never wasted as the body remembers what is good for it. The next time you come back to it will be better. As you develop as a teacher or student you will get better and better at teaching this.
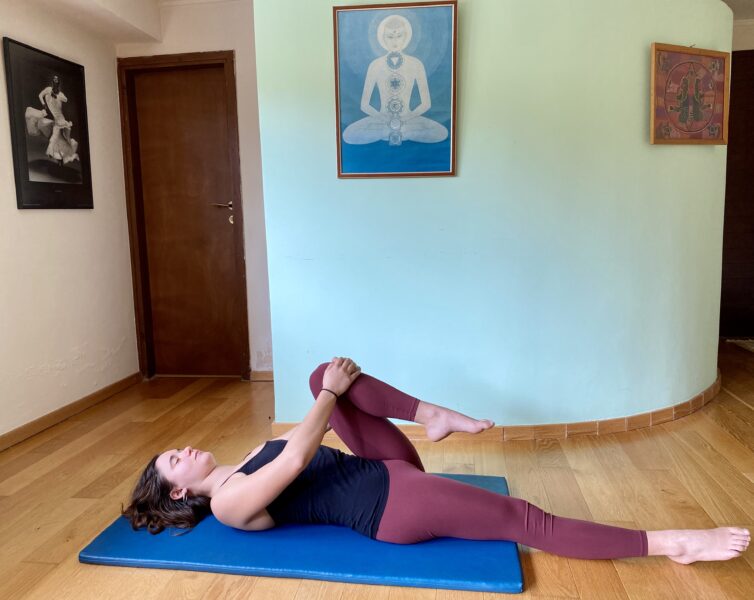
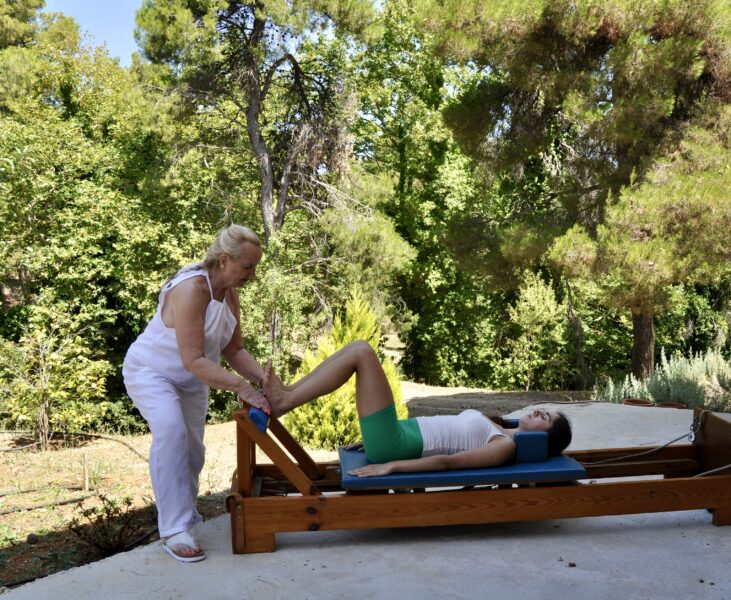
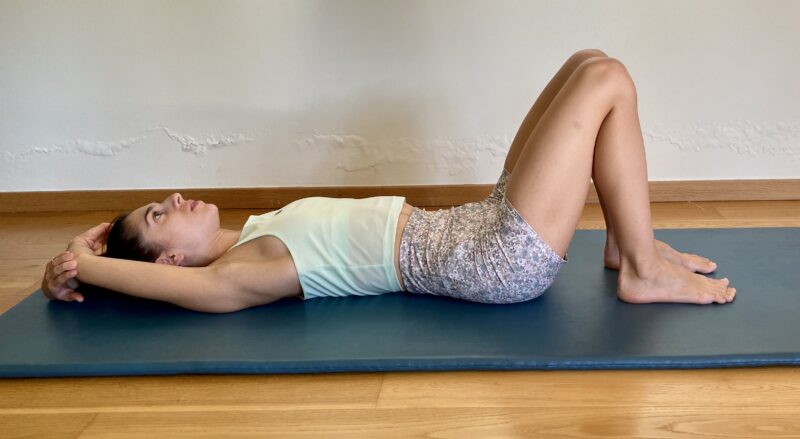
STARTING POSITION. 

The student sits on a mat with her back supported on a cushion placed against a wall. Her knees are bent, the heels in a straight line with the sit bones. 

☆ Sit directly in front of your student with your legs comfortably open. (You may need to move back as the exercise progresses.) Explain to the client that you will be working on aligning the bones. The flesh, the muscles and the fascia need to be as relaxed as possible in order for them to follow the new alignment of the bones. They should feel like a bone person. Tell them to imagine three straight lines of energy.

THREE LINES OF ENERGY

  1. THE FIRST LINE CONNECTS THE SIT BONE TO THE HEEL I imagine a string that connects the sit bone to the heel.
  1. THE SECOND STRAIGHT LINE IS DRAWN BETWEEN THE CENTER OF THE KNEECAP AND THE SPACE BETWEEN THE BIG TOE AND THE SECOND TOE. Be very careful that you define the actual kneecap (patella) and find the center of it. You need to let the leg slide down on some people to find it. Do not look at the general shape of the knee. Work only with the bones. If there is miss-alignment some muscles may be overdeveloped. 
  1. THE THIRD LINE IS AN IMAGINED PLUMB LINE THAT BEGINS ABOVE THE KNEE, RUNS THROUGH THE CENTER OF THE KNEE TO THE GROUND (TO GRAVITY).  Imagine there it like a string with a weight at the end. The client will slowly straighten the leg keeping this image in mind.

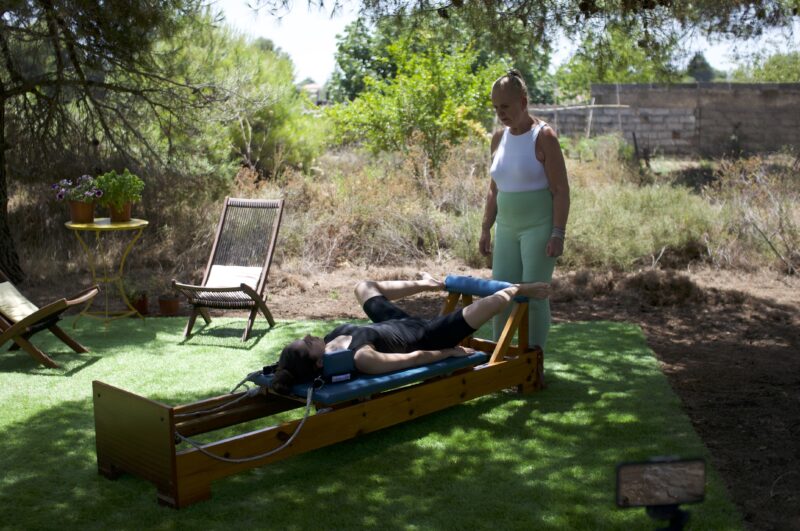
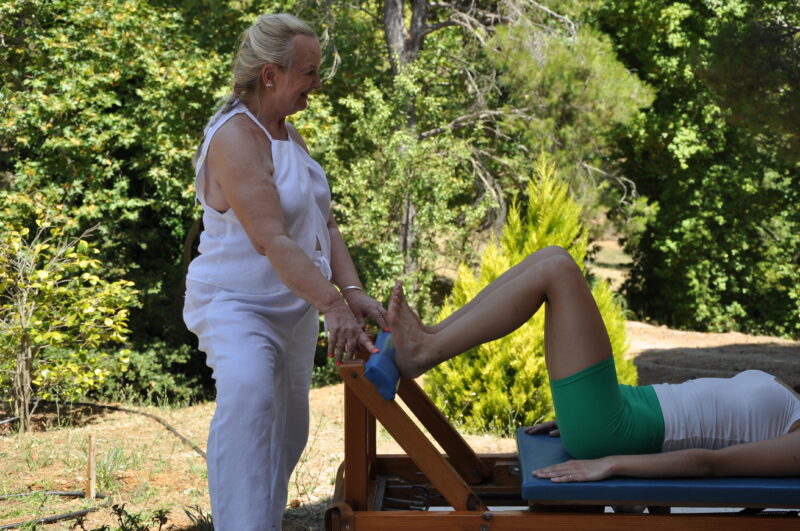
The teacher/helper holds (and therefore defines) the kneecap between the thumb and the second finger of one hand and keeps the heel in alignment with the other. Be careful that your touch is firm but not harsh.

Ask the student to begin sliding her foot along the mat moving towards straightening the leg. Both of you make sure that the architectural lines are adhered to.

The client leaves the weight of the heel well into the floor (without pushing). This helps her to keep the hip joint soft and relaxed. The toes are relaxed.

FOCUS AND BREATH

Problems with miss alignment usually occur about half way down. The second there starts to be a miss alignment stop. Ask your client to close her eyes and to focus gently and non-judgmentally into her own body and notice where she might have tension, holding or even pain. Once she identifies this area ask her to keep her focus there. Remind her that energy follows thought. Just by focusing 100% on an area of her body in a loving non-judgmental way she has already started a process of change, of healing. Tell her to take a deep breath in and as she breaths out to soften in that specific area. Take your time. The process may take two or three breaths or there may be more than one area of tension. ONLY when you have both completed this process start continuing the exercise. It may be that you must stop more than once before the leg is finally straight.

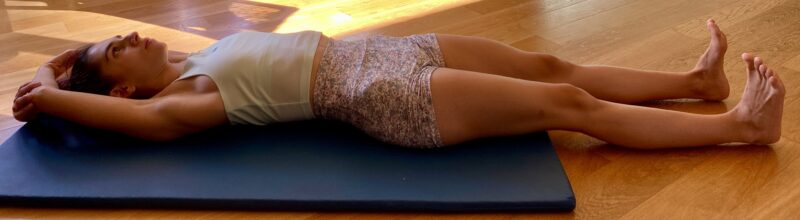
Another moment in time, which is very important in this process, is just before the knee finally straightens. Many people grip the knee as they do this. In order to prevent this happening ask your client to imagine the floor coming up to the knee rather than thinking of the knee straightening. This often helps to avoid old patterns.

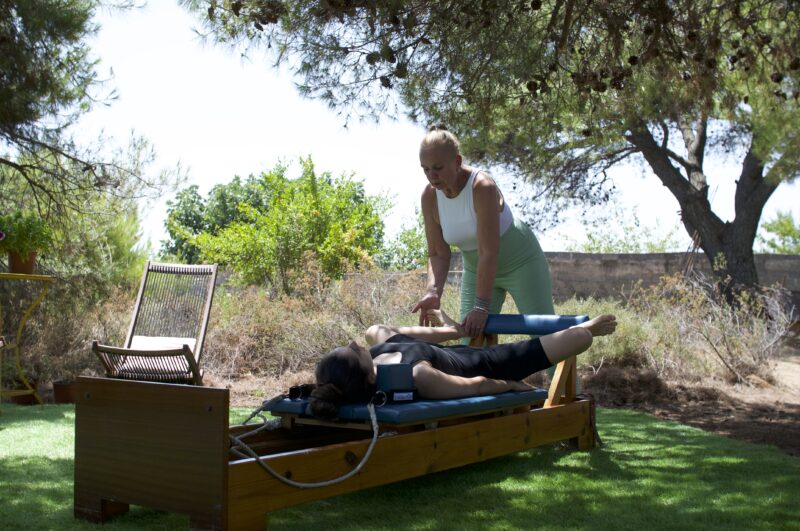
DEFINING THE SHIN BONE

Now that the leg is straight, define the shinbone both for yourself and your client by, starting at the top of the shinbone and gently walking your fingers down the length of it. Noticing where the top of the shin bone is in relation to the Patella will give you an idea as to whether the connecting ligament is misaligned and therefore under strain.

Ask the client to lengthen the shinbone. You can do this by initially defining a small distance between two of your fingers on the upper surface of the bone. Make sure that you are touching gently but the client can feel your fingers. 

One finger will always be at the head of the shinbone the other further down. It is possible to feel if the client is lengthening the bone or not. Increase the distance until you are accessing the whole length of the shinbone. Continue the process of lengthening by placing the fingers at the point between the end of the first and second toe and getting the client to lengthen towards your finger. Keep microscopically moving your fingers away all the time encouraging the client to lengthen.

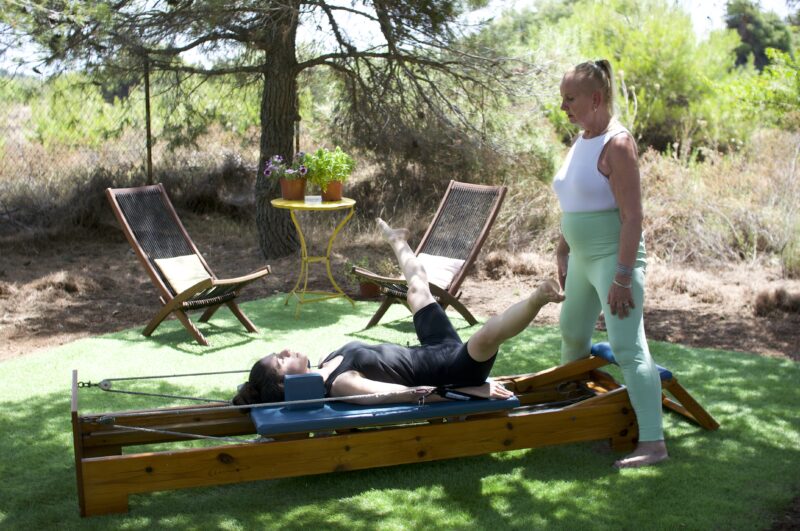
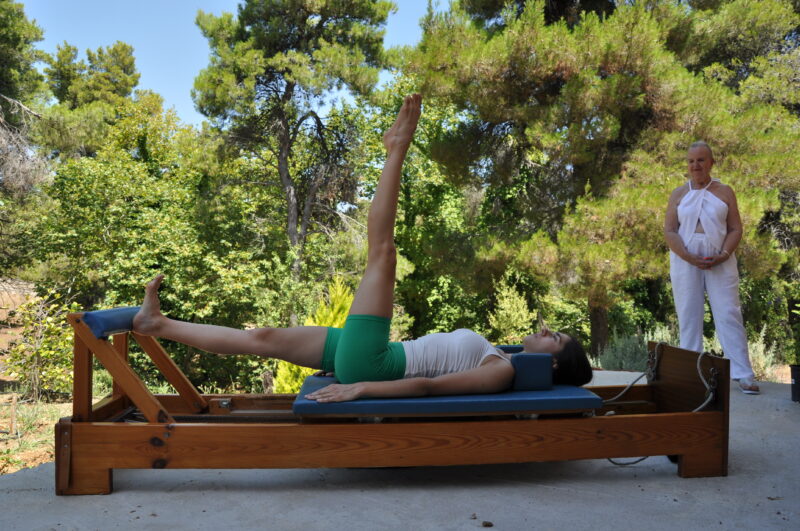
LIFTING THE LEG WITHOUT GRIPPING

When you are satisfied that the lengthening is enough for this moment in time ask the client to continue the lengthening process. Define a spot on the thigh bone one third down from the highest point ask the client to send that point straight down to the mat. The lines of energy should be exact and specific.

Continue the process of lengthening (place your finger once again at the point between the big toe and second toe) until the leg lifts. The minute you might feel that the client shortens the leg in an effort to lift make her stop and start again changing the habit of shortening and griping the muscles to lift.

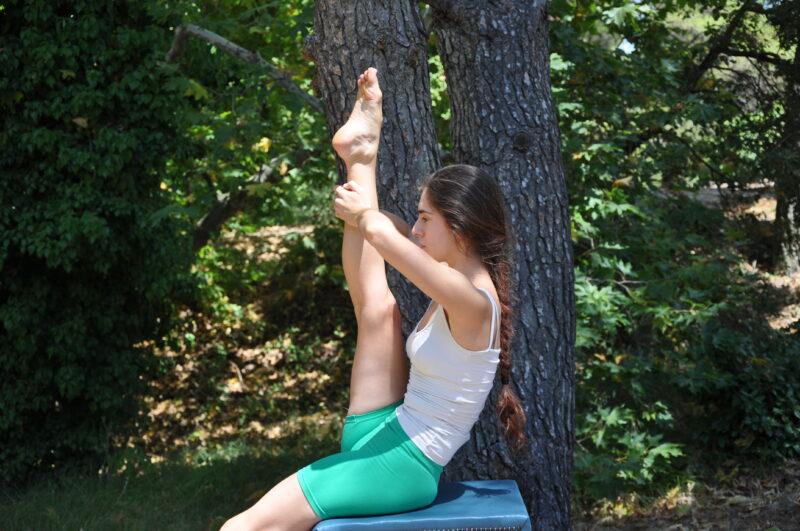
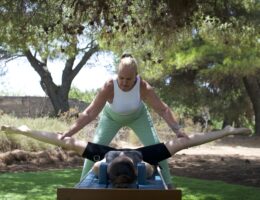
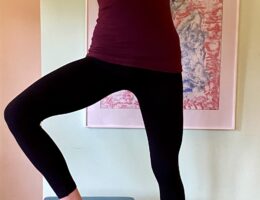
TURNING OUT THE ALIGNED LEG

Once you have achieved this either with the leg in the air or on the mat continue the process of lengthening and get the client to rotate ONLY IN THE HIP JOINT. 

EXPLORATION

I love  the Anatomy Coloring Book. Colour the page or pages of the bones of the leg and put it up somewhere that you can see it often.

Practice the leg alignment exercise alone or with help make a note in your journal how these exercises help you personally.

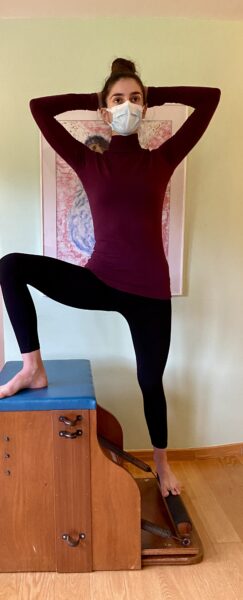
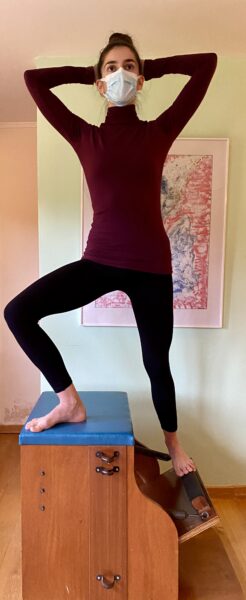
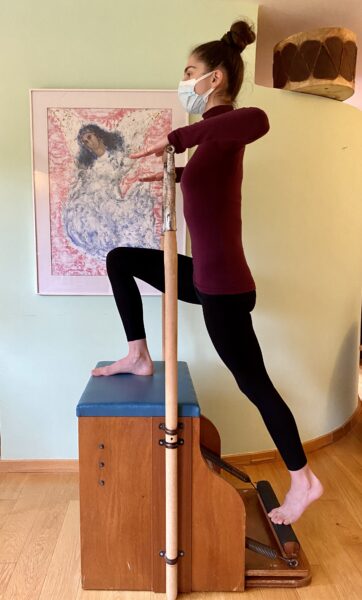
OBSERVE HOW THE PLACEMENT OF THE FEET AFFECTS LEG ALIGNMENT AND HOW LEG ALIGNMENT AFFECTS THE BACK.

Continue to observe how people use their feet but now also the alignment of the whole leg especially the relationship of the foot and the knee.

Notice if people with back problems or knee problems have good leg alignment or not. 

Make notes on what improves in your own exercise with better leg alignment.

My deepest thanks and gratitude to the late Don Farnworth , a wonderful ballet teacher and Reiki master who passed on this very essential work to me.

Copyright Jenny Colebourne.

Blog, Refined Pilates, Yoga

ELEGANT FREE LONG LEG EXTENSIONS

Part 2.

Sophia Karasso. Dancer, History of Art Student and student in the Refined Pilates Teacher Training.
Themis Andreoulaki. Dancer, Refined Pilates Teacher and Graduate with distinction from the Refined Pilates Teacher Training.

Blog

ELEGANT FREE LONG LEG EXTENSIONS

Blog, Refined Pilates

LEG OPENINGS ARE IMPORTANT FOR IMPROVING SCOLIOSIS KYPHOSIS AND BACK ACHE

Important Information for both Pilates and Yoga Instructors and Practitioners.

TAKE CARE OF YOUR LEG ALIGNMENT

There are many exercises and asanas which involve opening the legs with large and small equipment and without equipment. It is vitally important that good leg alignment is continuously maintained. You will never injure yourself if you are patient and respect this. You can find details in my blog on this site https://jennycolebourne.com/good-leg-alignment-is-essential-for-everyone/

TREAT YOUR BODY WITH LOVING KINDNESS

It is a golden rule that you should NEVER push, force or strain when you are exercising. Respect and love your body with kindness. The truth is if you co operate with your body and gently relax and surrender into a stretch your body will open like a flower. Moving or stretching, with harshness, will only lead to more body resistance and injury. Do you like to be pushed around? Probably not. Your body is the same.

THE BREATHING DIAPHRAGM HAS THE HIGHEST CONCENTRATION OF FASCIA

When we think of diaphragms of the body, the first one we think of, is the breathing diaphragm. The breathing diaphragm is obviously, vitally, important. It plays a crucial role as to how much oxygen reaches the millions of cells of our body. It has the highest concentration of fascia in the body. Fascia can store psychological and physical trauma which can lead to postural dysfunction, strain and pain.

THE BODY’S DIAPHRAGMS

The breathing diaphragm is just one of a series of diaphragms in our body. The one diaphragm is balanced on top of the other. The one affects the other. 

The pelvic diaphragm is positively opened when we do leg openings and than in turn had helps the breathing diaphragm to release. You will notice that your own breath, and the breathing of your students, becomes deeper as you do leg openings. In turn, the thoracic inlet softens. Necks release. The positive wave of release continues up through the crown of the head, resulting in a longer spine and a happier human.

A PERSONAL EXPERIENCE

I remember many years ago, long before we had the knowledge of fascia that we do today, I was suffering from quite severe and debilitating back pain. In those days I had a shiatsu therapist at Illium Center. I asked her to give me a treatment. I remember I had intense pain as she applied pressure to points around my should blade. It was very painful. All of a sudden it was as if the the top of my head blew off or popped open. AND there it was, MAGIC, my back pain was gone!

LEG OPENINGS HAVE A POSITIVE EFFECT ON SCOLIOSIS, KYPHOSIS AND BACK ACHE.

SOME EXAMPLES OF LEG OPENS IN THE PILATES TECHNIQUE AND YOGA.

(This is not meant to be an exhaustive list but just some examples.)

PILATES

Mat Work.

Spine Stretch

Saw

Open Leg Rocker.

Reformer

Second position using the full opening in the leg work series.

(See my video on You Tube.) https://youtu.be/zvWamobo9FI

Leg Openings with Assistance. (I will be releasing a new video on this shortly and teaching a special class about it.)

Leg springs. (These can also be done on the Cadillac.)

Standing Splits

Wunda Chair

Spine Stretch

Front and Side Lunges.

Baby Barrel and Spine Corrector.

Circles

Splits 

Helicopter

(This series can be done during mat work with a small soft ball under the sacrum.)

YOGA

Deep Forward Bends standing and seated.

Hanuman.

Enjoy exercising consciously. Enjoy your observations and the deep changes in your body.

Blog

THE FOOT WORK ON THE PILATES REFORMER IS THERAPEUTIC FOR BACK PAIN. PART 2.

Part 2

BREATHE DEEPLY AND EASILY

Don’t be afraid to experiment with breath. Pilates did! 

Jerome Andrews taught us exercises with “sighing” breath, for releasing; holding the the breath out, to utilise the healing effect, of the *“still point” and deep, rich in breaths, followed by a soft, blowing, long, out breath. All of these are different and serve different purposes  and intentions. 

When we release the breathing diaphragm, we release the largest concentration of fascia in our body. This alone can result in relief from back pain.

Colour the breath. Fill it with intention. Breathing in power and energy. Breathing out tension, negative thoughts and judgements of our body. 

Let go of the old. Draw in, the the new and the positive.

NEVER FORCE YOUR BREATH

Over time the muscles supporting your breathing system will strengthen. The tension patterns in the fascia of the breathing diaphragm will release and let go. The breath will naturally expand. Until then go with what is easy for you. Float on the breath.

USE YOUR BREATH INTENTIONALLY.

Breath is a conduit to filling each of your cells not just with oxygen, but with positive energy.

Here is an example to practice.

Today:-

Each time I breathe in I think. 

“I breathe in energy.” I have practiced this when coming to an ashtanga practice, seemly exhausted, and not knowing how I will get through it. It works! I was so surprised at my practice that day. I started feeling by I might not get through it and finished with the glow and satisfaction of a deep session. I can’t remember what happened exactly but it was good.

“I breathe in light.”

“I breathe in strength.”

“I breathe in clarity.”

“I breathe in knowledge.”

“I breathe in change.”

“I breathe in perfect leg alignment.”

Make an ever expanding personal list and chose one to focus on. 

The out breath is a letting go process.

“I breathe out tiredness.”

“I breathe out previous negative thoughts about my body.”

“I breathe out and I surrender more to gravity.”

“I breathe out, and use my sites of support, to release my joints, and keep them relaxed.”

“I breathe out and feel my spine long and relaxed.”

FLOAT ON YOUR BREATH. FLOAT ON HAPPINESS.

BREATHING EASILY IS FREEDOM. FREEDOM OF EXPRESSION.

HAVE YOU OBSERVED PEOPLE WITH SCOLIOSIS, KYPHOSIS DO NOT BREATHE EASILY?

Using the breath well will help these students overcome their problems.

PEOPLE WHO ARE ANXIOUS MAKE THEIR BREATHING SMALL.

It is like they want to hide and to make themselves as small as possible. Deep, regular breathing gives a sense of calm, peace and focus.

THE BREATHING IN THE FOOT WORK ON THE PILATES REFORMER PLAYS A HUGE ROLE IN HEALING BACK PAIN.

I chose even breaths. The in breath lasts as long as the out breath. The in breath is strong as the out breath. It is like a circle. I find the Ujjayi breath from yoga is the most effective. Students’ breathing rapidly improves as does their focus. It is a strong practice.

Variation 1

Let’s chose a breath pattern for our foot work. Let’s choose BREATHE OUT to push out and BREATHE IN to come down. 

I know this is the opposite way to the way to the way it is often taught. 

Ok. What does this way offer?

When you BREATHE OUT the breathing diaphragm goes up. This gives you more space, internally, to energise the muscles of the pelvic floor for support.

When you BREATHE OUT the belly naturally drops. Take advantage of nature and allow the deep abdominal muscles to drop and engage, naturally, without tension.

When you BREATHE OUT it is a process of surrender and therefore as we travel back we can enhance the sense of surrendering the back of the body to gravity. 

Once again, THIS IS NOT PUSHING THE BACK DOWN. 

Surrendering the upper back in this way, magically releases, the habitual tension, in the shoulders and upper back. Watch magic happen!

So what does the IN BREATH on the way down offer us?

We can learnt use THE IN BREATH in such a way that we emphasise filling the back of the lungs. This helps us once again to come into touch ever more deeply with the back of the body’s connection with the surface of the bed and the surrendering to gravity.

THE IN BREATH has a sense of suspension. Dancers use it, to seem to hover in the air, at the height of a jump.

THE IN BREATH naturally creates more space between the last rib and the iliac crests. It literally creates more space in the spine. 

Expansion. 

We can consciously use this to open up the spaces between each vertebra. 

Variation 2.

CHANGING THE BREATH TO THE OTHER WAY ROUND

CHANGING THE BREATH TO THE OTHER WAY ROUND is not wrong. 

It offers the feeling as you push out of filling the back of the lungs and emphasising the connection with the back of the body to the surface of the mat, of being supported, of taking in energy.

The out breath on the way down can be used to release tension in the joints, and be more relaxed.

WE NEED TO BE RELAXED TO BREATH WELL.

I just prefer the first way. I can get more juice out of the exercise.

Variation 3. 

WHAT IF WE USE MORE BREATHS?

Aaaa this is my favourite way:

BREATHE OUT to push out. Read all the notes above and from the previous blog.

BREATH IN AT THE TOP OF THE MOVEMENT AND STAY.

Visualise a line of light extending back in the space above the crown of the head. ( The point where the sutures meet, about one third back from the hair line, the place that is soft on a baby.)

Our imagination is a powerful tool and just doing this will create more space in the spine.

Be careful not to change the position of your ankles.

BREATHE OUT. STAY WHERE YOU ARE.

Feel like you are hanging from that line of light all the way down to your toes, arches or heels (depending on which position of the feet you are using). 

Consciously release any tension you may have mistakenly placed in the hip joints.

If you are working in parallel. Visualise the angle of your thigh bones. Check this out in your favourite anatomy book! Many, many, many of of us carry a mistaken image of our thigh bones in our psyche. 

Double check if your tail bones are released, the end of your spine. This can result is a deep pain relief at the base of the spine and a widening at the back of the pelvis.

BE PREPARED TO ACCEPT A NEW SENSATION IN YOUR BODY. 

It can be a bit scary.

BREATHE IN. THE MACHINE  WILL STAY WHERE IT IS for the very first part of the movement to travel down. 

Careful not to change your ankles if you are on the toes. 

Continue to feel like the line extending from the crown of the head is being pulled out into the space behind you. As our beloved Bonnie Bainbridge Cohen says “space has magnetism”. 

Careful not to accidentally tense any part of the spine.

The machine will stay for the first part of the movement BECAUSE YOU HAVE LENGTHENED AND CREATED MORE SPACE IN THE SPINE.

You will get taller with each repetition.

You will feel a pleasant opening in the front of the hip joints which is super therapeutic.

Follow the instructions above and in the previous blog to come down. 

REMEMBER WHEN YOU GO TO PUSH OUT AGAIN YOU WILL BE IN A NEW POSITION OF THE BODY. BE CONSCIOUS, AWARE AND RESPOND ACCORDINGLY.

This is why the Pilates method does not have many repetitions. 

Each time is different. 

Each repetition evokes further change.

Just in case you missed it this is the link for part 1. https://jennycolebourne.com/the-foot-work-on-the-pilates-reformer-is-therapeutic-for-back-pain/

These are the links to some You Tube videos about foot work on the Reformer that you may find interesting.

https://youtu.be/Vnfw4wkG35k

https://youtu.be/zvWamobo9FI

https://youtu.be/7oYZGrLAOw8

  • “The Still Point” is a description used in Cranial Sacral Therapy. The body comes to a place of quiet, where the cranial rhythms stop. This can last a varying amount of time. The system spontaneously starts up again, often in a more balanced, easeful way.

During the “still point” the body can go into an unwinding process. The unwinding movements come from deep in the body, and can range from small and subtle, to quite large. They happen spontaneously and have nothing to do with the logical mind. It is important not to judge them because the results are always therapeutic/positive. “Still Points” can occur during movements or exercises. The Head Stand in yoga is said to bring you into this state. The 100s in Pilates, with the breath held out, as Jerome taught it, can lead us into a “still point”. 

THE FOOT WORK ON THE PILATES REFORMER IS THERAPEUTIC FOR BACK PAIN

PART 1 

 PILATES’ EQUIPMENT IS YOUR BEST FRIEND

I first saw Pilates equipment, when I was sent down to the Pilates studio at the London School of Contemporary Dance in 1974. I was sent down, by Jane Dudley, because I had hurt my back! The equipment looked like torture instruments. 

I now know the history of these strange machines. After years of working with them, I know the secret! These machines are actually your best friends. All Pilates equipment can be, and should, be used in a healing way, to make us feel better, lighter and pain free.

I am going to talk about the the foot work on Reformer and how these exercises can ease back pain and improve posture in this blog.

THE RESISTANCE OF THE SPRINGS

It is natural to first think that the resistance of the springs is to principally to strengthen muscles.

The springs are actually used as a source of support rather than something to fight against.

Pilates used heavier springs for beginners. The more advanced the student, the lighter the springs, and the fewer.

My teacher Jerome Andrews was a professional dancer, went to Pilates, as many did, because he had an injury. Because he was strong and well trained, Pilates only used one light spring on the Reformer for Jerome. Why? The less support, the harder the exercise. For this reason the Mat Work is much harder than the exercises on the equipment.

I suggest when you do the Foot Work that you use a combination of springs that is just enough to give you support, so no not too light, and not too heavy. The springs are too heavy if you are having difficulty pushing out the machine. It should not be a struggle. If it is too heavy you will not be able to focus on the details of how you do the exercise.

SITES OF SUPPORT. THE SURFACE. THE BED. 

Pilates was a genius. He designed his equipment responding to the needs of his clients. He initially attached springs to the hospital beds, to help soldiers recuperate from their war injuries. His designs became ever more sophisticated. He had a workshop next to his studio where he built equipment which would help with an issue that he was seeing in his classes.

SURRENDERING THE BACK OF THE BODY TO GRAVITY

The bed of the Reformer acts as a guide for the spine and the back body. 

A lot of Pilates’ exercises are non weight baring, that is you are lying down. This is deliberate. The student is able to surrender the weight of his body to gravity. He or she is able to relax. As he or she relaxes the student lets go of familiar holding patterns that may in fact be unhelpful.

There is a sense of being supported, which is very important for people with tension in the shoulders, upper back and kyphosis. The instructor can see a literal transformation in the upper back when a student learns to surrender the natural weight of the upper body.

Be very careful to not confuse surrendering the back of the body to gravity and pushing the back down. This has a completely different energy and can lead to a lot of imbalances. 

PILATES DID NOT USE A LOT OF PADDING OR UPHOLSTERING BECAUSE HE WANTED HIS STUDENTS TO BE ABLE TO FEEL THE SPINE.

According to Jerome, who worked with Pilates for 10 years, Pilates did not use a lot of padding or upholstering because he wanted his students to be able to feel the spine. Jerome’s folding Reformer, which I was lucky enough to make a direct copy of, had no padding at all. Dancers are used to working this way. They are used to lying on floors to exercise.

TRIANGLE OF THE PELVIS

Some people have more pronounced spinal curves. In order to be absolutely certain that we are not, in any way, forcing or pushing our back down we can check the boney parts of our pelvis. These bones act like a map, or a guide, for us when we are finding a new state of balance in the body. The 3 boney landmarks are, the pubic bone, and the 2 front boney parts of the illiac crests. These boney land marks form an upside down triangle. These 3 points, at all times, need to be parallel to the floor, on a level with each other. The minute you feel, for example, the pubic bone move more forward of the other two bones, you are “tucking”. In other words you are causing the natural curve of your lower back to be falsely straight. This over time will cause injury without a shadow of a doubt especially if you are exercising with the resistance of the springs. STOP. START AGAIN, AFRESH. DO NOT REPEAT OLD BAD HABITS. The same goes with having the pubic bone more back. We are very conscious, very aware, every second in time, when we exercise.

THE BAR ON THE REFORMER

The bar on the Reformer is deliberately set higher than the bed making it easier for us access the power of the pelvic floor and internal abdominal muscles which are our essential support or power house as Pilates called it. 

Having the feet higher is more restful, for the back and the heart. It is better for our circulation.

It easier to “rest” the feet on the bar and as a result it is easier to be sure the hip joints are relaxed. This in turn helps the back to be relaxed. The knees and ankles can be soft. Joints are designed for movement not support.

THE BAR ON JEROME’S REFORMER IS ROUNDED

I learnt a lot about the details about how you very meticulously use the feet during the footwork with Jerome. I saw clearly with my own eyes, (because he made us work with bare legs), how, with each nuance, the leg muscles worked differently.

The wrapping of the feet and toes in “Bird Feet” was even more supported with the round bar. 

Whichever type of bar you may have it is important to use it well. The bar is another site of support. Spread the toes, especially between the big toe and second toe when working with positions on the toes, so that you have as large a surface area as possible for support. The toes are long, absolutely not tense, and meld into the bar.

SCOLIOSIS

The Reformer is great for people with scoliosis. Apart from everything I have said previously, the bed of the Reformer acts as a guide so you can be conscious, and adjust as you push out, that the back of the pelvis and the back of the ribs are evenly dropped to gravity. Once again, if you realise that the one side of the pelvis is “lighter”, not so surrendered to gravity, at some point in your movement STOP. START AGAIN, AFRESH. DO NOT REPEAT OLD BAD HABITS. Yes it does require patience and intense focus, but believe me, it is well worth it. The next time you come to do these exercises, I guarantee, it will be much improved. The body is very forgiving! It gravitates to what is good for it.

PRESS EVENLY WITH BOTH FEET

Pressing evenly with both feet is important for us all, however, it is something people with scoliosis need to be very vigilant about. Again, do not continue with a mistake. Stop immediately you realise, and start again. You will be surprised at how fast your body learns.

OPENING UP SPACE IN THE SPINE

We can use the support of the springs to open space in the spine. This is something positive for all of us but especially beneficial for those with scoliosis. 

Press out and when you get to the top of the movement give yourself an extra breath. 

Focus on the top of the head, the part that was soft when you were a baby. Imagine there is a string there extending out, along your axis, to the space above you. Imagine someone or something is pulling you back into that space. Literally, when you first bend the knees to start the downward movement ,the bed will not move, because you have lengthened so much. As you continue coming down keep that energy coming out through the crown of the head. The spine is light and long.

Oftentimes the way way we practice is like putting together pieces of a jigsaw. Yes, we focus on lengthening the spine, but we still surrender the back of the body to gravity, have our joints soft etc all at the same time. 

LORDOSIS

Good practice is good practice and everything I have said previously applies to those humans who have lordosis. Very few people have actual lordosis, it is usually postural. 

Check out the triangle of the pelvis and the surrendering of the back of the body to gravity. You may need to focus, more, on the lumbar spine, make sure you relax it and surrender it to gravity. You may have a habitual tension in the lower back which you will need to address with loving care and simply NOT anymore tense there to do something.

Please look at my previous blog about leg alignment. Good leg alignment is essential to easing back pain. https://jennycolebourne.com/good-leg-alignment-is-essential-for-everyone/

My blog about openings is important for people with scoliosis. https://jennycolebourne.com/leg-openings-are-important-for-improving-scoliosis-kyphosis-back-ache-and-well-being/

I made three videos on You Tube about Footwork on the Reformer. One is about parallel position of the feet on the toes https://youtu.be/Vnfw4wkG35k , the other with the heels open or second position https://youtu.be/zvWamobo9FI and the tendon stretches https://youtu.be/7oYZGrLAOw8

Part 2 will be out at the end of August.

Blog, Illium Center of Light

A FASCIA RELEASE DIAPHRAGM EXERCISE.

FASCIA RELEASE DIAPHRAGM EXERCISE.

The diaphragm has the largest concentration of fascia in the body. Releasing the natural movement of the diaphragm allows us to breath deeply and easily, with the many positive consequences that breathing well brings. Breathing is a natural massage and stimulation for all the organs of the body. 

Releasing the full movement of the diaphragm is good for all of us, but it can dramatically change, for the better, conditions such as kyphosis, scoliosis and  common neck and upper back tension.

RECOMMENDED.

This exercise is really important for everyone and highly recommended for those who have a problem breathing deeply, kyphosis, scoliosis and neck and upper back tension.

I have noticed that many people have not had the experience of how the body feels, internally, as they breath. This exercise helps them to become aware of the action of the diaphragm and to be more in touch with the internal mechanism of breathing. I find people breath much more effortlessly once they understand this missing piece of the puzzle.

REPETITIONS.

1 set.

STARTING POSITION

Themis Andreoulaki. Dancer and Refined Pilates Teacher. Graduate of my Refined Pilates Teacher Training.

Lie on your back with the knees bent and hip width apart. The leg alignment is really important throughout this exercise. Please refer to my previous blog on leg alignment. https://jennycolebourne.com/good-leg-alignment-is-essential-for-everyone/

Bring the arms above the head and bend the elbows. The right middle finger accesses the fascia through the skin just below the left elbow. The left middle finger touches the skin just below the right elbow. The arms are on the floor. Remember to really surrender the weight of the upper back into the floor. It helps to imagine you are floating on your back in the sea or falling backward onto a comfortable feather bed. Imagination is powerful ia a powerful tool. Use it.

PART 1

BREATHE IN

BREATHE OUT

Keeping the left hip still, it is your anchor, lengthen, or stretch, between the left hip and the left elbow. We need to be gentle if we wish the body to respond. The reason why the middle finger is used is to access the fascia The amount of pressure we use is about the weight of a leaf falling to the earth. No more. Ask yourself if you respond well if someone pushes you! It’s the same with your body, it doesn’t like you to push it around.  Use enough pressure so the body will cooperate you, otherwise it’s resistance kicks in. 

Be careful that you do not go into a side bend. You maintain your sense of axis. It is as if you wish to un-stick your last rib.

STRETCHING EFFECTIVELY.

When we want to stretch an area of the body there is a still and stable point. In this case it is the hip joint. Then there is a post that we pull from. In the exercise this is the middle finger accessing the skin below the elbow. Whatever is in between, muscle tissue, bone is as relaxed and passive as possible AND surrendered to gravity. We allow an opening a stretch to happen and each time we repeat it it will be different because the body has already opened up.

Repeat on the other side.

Repeat the whole thing 3-5 times.

PART 2

Flex the left foot. 

BREATH OUT

Slide the heel down so that the leg straightens. Make sure that you keep strictly to the leg alignment. Continue to surrender the weight of the back body to gravity. You should feel a gentle pleasurable “opening” in the Psoas and the front of the hip and thigh.

Leave the left leg straight and stretch the right leg down in the same way.

PART 3

Stay in this position with the arms above the head and the legs straight down.

Take a deep breath in, filling the back of the lungs. The breath should be full but without strain. As you breath in visualize the diaphragm traveling down towards the pelvic floor like a lift in a lift shaft. It does not go front or back, neither does it go side to side, it just travels straight down. Remember the diaphragm is centered in the body at the level of the base of the rib cage.

On the out breath, which is long, slow and complete simply stretch the head up in one direction. You can imagine a golden thread extending from the crown of the head and being pulled back. Imagine the three points of the heels being pulled down in the opposite direction.

Repeat 3-5 times.

Relax the arms down, beside you, allowing the palms of the hands to go towards the ceiling and notice how you feel.

NOTE

Try doing the abdominal exercises after the diaphragm exercise. I think you will find them more effective.

Blog, Illium Center of Light, Refined Pilates

PRECISION AND THE LIGHTNESS OF BEING.

THE SIDE LUNGE ON THE WUNDA CHAIR.

When I first did the lunges and some similar exercises on the Wunda Chair I was very impressed by how it automatically engaged me with the pelvic floor and my axis..

ALIGN THE BONES

Precisely align the bones. Geometry is sacred. Aligning the bones makes the movement effortless. The muscles and fascia follow the bones effortlessly and naturally. You will never injure yourself this way.

 I have found it very effective to explore, moving, as if I were just made up of bones. It can put you better in touch with the skeletal system. 

ALLOW THIS MIRACLE, THAT IS YOUR BODY, TO INFORM YOU. 

Rather than acting like a dictator, open yourself up to listen to your body.

Experience sensation fully.

LINES OF ENERGY.

Imagining lines of energy helps the body understand where it should move to. Using your imagination is a powerful tool. 

GIVE YOURSELF SPACE.

Personally I find that when people imagine they have a huge amount of space, their spine lengthens. Movements have more generosity and freedom.

EXPLORING IS FUN.

Being curious about how far the body will go is joyful.

BREATHE

Let the breath take you like a piece of music moves you. Practice breathing just a little ahead of the movement and then allow the breath to colour all of the movement.

There are many ways of breathing, all valid, and all serving a different purpose.

HAVE FUN FLOAT UP. 

The springs are there to give you support. The equipment is designed to be your best friend. Go with it, play with the support and see what it will do for you.

EQUIPMENT SET UP.

One spring up and one down.

REPETITIONS

3-5 on each side. 

Always do the same repetitions on each side. If you do three on the right do three on the left, even if you you feel the one side is stronger. It is a matter of balance.

SET YOUR INTENTION.

What is it you would like to learn about your body in this exercise today. It may be something as simple as, “Today I will not tense my shoulders” or “Today, my legs are perfectly aligned throughout. Or “Today I will feel plenty of space around me.”

Themis Andreaoulaki. Dancer and Refined Pilates Teacher Training Graduate.

STARTING POSITION.

Stand sideways to the chair. Take the bar down with the foot, let’s say this is the right foot, that is nearest to the chair. Mount the chair. Have the inside foot on the wooden part and the align the left (outside) foot along the bar towards the back corner. Place the right (inside) foot on the top of the chair at 45’ angle, the toes towards the front, furthest corner. The exact positioning of the feet will depend on the flexibility of your hips. Bring your axis, your spine (on the line of gravity) between your legs. Bring the triangle of your pelvis ( the front of the two iliac crests and the pubic bone) so that it is on one plane and facing directly front. You may need to release in your hips to achieve this.

The alignment of the knee on the seat is super important. The knee cap is focused directly over the space between the first and second toe. See my previous blog on leg alignment. https://jennycolebourne.com/good-leg-alignment-is-essential-for-everyone/

BREATHE IN.

Draw air into the back of the lungs.

BREATHE OUT.

Slowly and smoothly. Empty the lungs completely.

Feel energy rising from the toes, up through the pelvic floor, up through the spine and out through the top of the head. This energy draws you upwards. You are subtly aware of the left foot on the bar. It never leaves the bar. There is a contact with the bar that lightens as you go up.l

The right foot imprints down powerfully and the leg engages strongly. The pelvis remains facing front. 

Themis Andreaoulaki. Dancer and Refined PIlates Teacher Training Graduate.

BREATHE IN

Smoothly, descend with a sense that the crown of the head continues to be drawn out into space.

NOTES.

It is nice to come to a balance, with the leg extended to the side, on the top of the chair at the end of each set. Make sure you straighten the knee.

ENJOY!!

Blog, Illium Center of Light

FRONT LUNGE ON THE WUNDA CHAIR

PRECISION    BODY    TONE    GRACE    BALANCE    CONTROL  

Open space in your body.

LEVEL

INTERMEDIATE EXERCISE. 

For people who have mastered the basics of Refined Pilates and, especially, leg alignment. Please look at my blog https://jennycolebourne.com/good-leg-alignment-is-essential-for-everyone/

SPRING AND EQUIPMENT SETTINGS.

Medium Support. On my Wunda Chair, one spring up and one down is good.

The exercise can be done with, as shown in the photos, or without the poles.

The poles afford a very light and subtle support. They are not meant to be leant on!

Themis Andreaoulaki, Dancer and Refined Pilates Teacher Training Graduate. Starting Position.

STARTING POSITION.

Stand facing the bar. Place the hands on the handles for a modicum of support. Press the bar down with the toes of the left foot. Mount the bar. Place the right foot, in parallel, on the back edge of the seat of the chair. Softly spread and lengthen the toes. The knee is bent and the knees cap is in a straight line with the space between the first and second toe. The left leg is straight, the toes are spread and are on the bar. The heel is soft. It is in, what dancers call, “demi relevé”. The front of ankle is soft. The foot stays in this position throughout the exercise. The left leg is in parallel.

Think of the bones that form your pelvis and bring your pelvis so that it is centered between the legs. Bring the iliac crests in a line. This will probably involve softening in the hip joints. Make sure the triangle of the pelvis ( the two iliac crests and the front of the pubic bone are in one line. This will usually mean an enlivening of the pelvic floor, the engagement of the deep abdominals and an allowing of the coccyx to be free and hang. The spine in in the second position (see my blog) https://jennycolebourne.com/second-spinal-succession-and-position-for-refined-pilates-and-yoga/ or naturally straight, with the curves present.

The palms of the hands are placed on the top of the handles. They very softly push down for support. Use the support, soften your shoulders and gently widen between the elbows. The collar bone is open.

If you do the exercise without the help of the poles you can extend the arms to the side, or have the left arm forward and the right to the side.

Having the left arm forward reminds you to keep the left hip forward.

It is important to sense the extremities, to feel the toes at all points of the exercise, and their contact with the bar, and the crown of the head actively lengthening upwards.

BREATH IN

Feel the air traveling into the back of the lungs. Lengthen the ribs away from the hips to create more space.

BREATH OUT

Feel the toes on the bar, it is as if an energy rises from there, connect the pelvic floor, in your mind’s eye feel the that energy rising up through your axis and out of the crown of the head. It is as if the crown of the head is being drawn out up to the sky. It almost feels as if you are being pulled upwards and out into space. 

Feel the right foot very firmly on the seat of the chair. Feel gravity and press into it (be extremely vigilant about the foot alignment).

Allow the springs to lighten. They help draw you upwards.

Themis Andreaoulaki, dancer and Refined Pilates Teacher Training graduate at the top of the movement.

BREATH OUT

Leave the crown of the head where it is and gently and smoothly lower the bar.

NOTES

Keep the two iliac crests facing front throughout.

You can come up into a balance on one leg (arabesque), on the seat of the chair, either each time, or on the last repetition.

REPETITIONS

3-5

Blog, Illium Center of Light

WUNDA CHAIR “THE PIKE”

SPRING POSITION

On my hand made (before commercial machines) Wunda Chair, the best setting is to have one spring up and one down.

Look for medium support on your Wunda Chair.

 STARTING POSITION

Face the the seat of the chair.

Place the palms of the hands on the back corners of the seat. The fingers are facing outwards. Keep all your fingers together. There is a little bit more weight on the little finger and the outside edge of the arm.

The elbows are very slightly bent. It is important to avoid hyper extending the elbows. You should feel the connection between the arms and the upper back.

Spread your toes, particularly between the big toe and the second toe, and place the toes of one foot on the bar and press it down. Mount the bar with the other foot, spreading these toes as described. Have the  feet and legs closed, straight and in parallel. Be careful not to hyperextend the legs. The legs should feel like 2 columns of energy. An alternative is the “V’ position, with the legs moderately turned out. I am choosing this position because it is easier to be sure of the leg alignment. See my blog  GOOD LEG ALIGNMENT IS ESSENTIAL FOR EVERYONE

It is a position which makes it easier to release the lower spine.

Shift your body weight and bring the shoulders directly over your wrists.

Make sure the shoulders are relaxed and down away from the ears.

Bring the back into the FIRST POSITION (or rounded) of the spine. See my blog about all the details of this position. Jerome Andrews’ Pilates. THE FIRST SPINAL SUCCESSION.

Check that your hip joints are fully relaxed.

The weight of the head is surrendered completely to gravity and is in a position where you can look at the legs through the exercise “spot” the leg alignment.

Themis Andreoulaki. Dancer and Refined Pilates Teacher Training Graduate. The highest point of “The Pike”

BREATH OUT.

Feel the toes, especially the big and second toes if you are working in parallel. Sense an energy passing up through the inside of the legs and engages the pelvic floor This energy passes through the back of the spine, spinous process by spinous process, starting at the coccyx and arriving at the atlas, and out the top of the head in a long arch, as you move.

The weight of your body transfers more and more onto the arms and you feel the support of the shoulder blades.

Allow the springs to lighten and help you, allow yourself to be carried up. Without losing the First Position of the spine, think of sending your sit bones high to the ceiling.

BREATH IN

Feel as if you fill the back of the lungs with air. Breathing in this way will deepen the position of your spine.

Reverse the spinal succession, following the back of the spine from the atlas to the coccyx. 

Lower the bar with moderate speed.

Themis Andreoulaki. Dancer and Refined Pilates Teacher Training graduate. The starting position of “The Pike”.

REPETITIONS

3-5

Breakdown of repetitions.

  1. How does my body feel, today, right now, as I do the exercise. Notice using the knowledge that I have, what can I do better?
  2. I apply my knowledge and refine what I am doing.
  3. According to my teacher, Jerome Andrews, number 3 is perfect!
  4. I hone my concentration and see if I can do the exercise better than my previous best.
  5. All the above applies. What can I do even better.

NOTES

I have chosen an out breath to go up. As we breath out the diaphragm travels up internally leaving more space for the engagement of the pelvic floor and the hollowing of the abdomen as our spine deepens it’s position.

Breathing in on the way down gives a sense of suspension.

It can, of course be done the other way round, just as effectively, and slightly adjusting the focus. 

The “Washer Woman”, see my video is a great preparation for The Pike. https://youtu.be/mgWWTfijmP0

Translate »