PART 1
PART 1
P
Leg extensions are beautiful.
When a movement is done beautifully, it is “right”.
When a movement is done beautifully, with harmony, it heals.
art 1.RLeg extensions are beautiful. When a movement is done beautifully, it is “right”.When a movement is done beautifully, with harmony, it heals.
When a movement is done beautifully, it brings joy to the soul.
When a movement is done beautifully, to the person doing, it feels good, to the person observing it, it is art.
This experience is available to all humans. There are no age, race, body type barriers.
To do a movement beautifully it takes time, patience, discipline, awareness, open mindedness and love. It is never achieved through forcing.
It is worth it.
There are many places and ways of approaching the elegant, long leg. This is just one, and the principals of it can be applied to many movements in Pilates, Yoga and life.
PLEASE REFER TO MY BLOG ON LEG ALIGNMENT. ALL OF THE PRINCIPLES OF LEG ALIGNMENT ARE APPLIED HERE. https://jennycolebourne.com/good-leg-alignment-is-essential-for-everyone/
STARTING PLACE
It is always important to start well.
Lie on your back.
Start by being humble.
Start by paying attention to your body, as it is at this point in time, without any need to judge it.
THE BEST WAY TO START A PILATES, YOGA, REIKI, CRANIAL SACRAL SESSION OR DANCE PRACTICE.
There is no separation between body, mind and spirit.
We are magnificent. We are much more than we realise.
Whatever happens, avoid judging anything. STOP criticising. Experience, explore and enjoy your whole self, in either movement, or stillness.
Take the stance that you do not “know” anything. Leave yourself available to new experiences, and leave the door open, to be surprised.
So let’s say we are lying down ( we can practice these principles just as easily sitting or standing).
Let your brain relax and begin sensing the body, through the cells of the body.
I grew up, as a dancer, learning the mind/ body connection. Bossing and pushing my body around with my brain. It is only quite recently, through Bonnie Bainbridge Cohen, to whom I am eternally grateful, that I started to explore, connecting with my body directly through the cells. I, now, find it crazy that I didn’t do this before! There are millions of cells in the body all carrying not only information about, how that part of the body was formed, how it is now, and it’s ancestry.
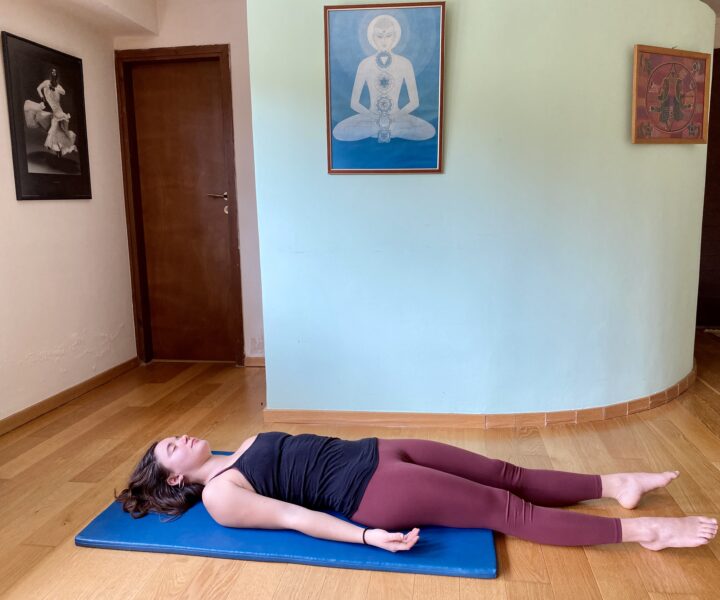
The nice thing is that, it is direct information, with total lack of judging.
GRAVITY
Surrender the whole of the back of your body to gravity. Be aware that this very different to pushing the back into the floor. Evtually you will have a feeling of being supported.
BREATH
Float on the breath. Let the breath flow, naturally, with ease.
NOTE
All of the above are continuous explorations. We become more and more familiar with them.
THE TRIANGLE OF THE PELVIS
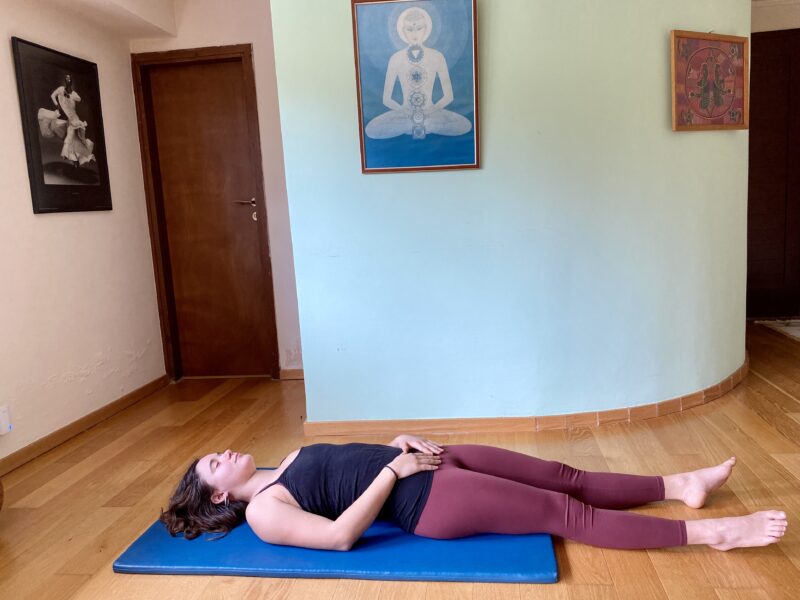
The “triangle of the pelvis” includes the pubic synthesis and the front edges of the iliac crests. These three, boney points, are parallel to the floor, throughout this exercise. At no point does the pubic synthesis go back or front of the front of the iliac crests.
Decide which side of your body is more present. Let’s say it is the left side.
BREATHE IN
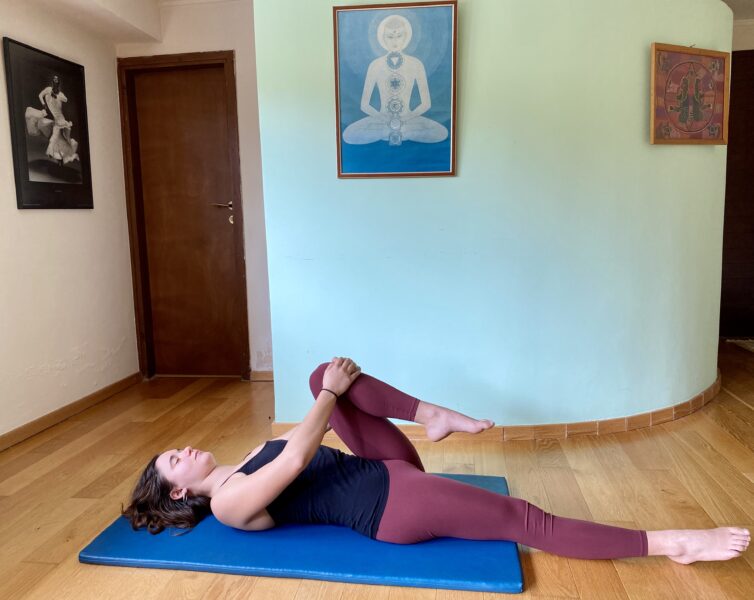
Bend the left knee into the chest. Keep the leg in parallel.
Place the hands, one on top of the other just below the knee at the beginning of the shin bone.
The elbows are bent to the side and the shoulders are relaxed. Surrender the weight of the upper back to gravity.
BREATHE OUT
Gently pull the knee into the chest, maintaining the parallel position. Make sure the two halves of the pelvis are evenly on the mat.
BREATHE IN
Hold the knee where it has arrived to.
BREATHE OUT
Make sure the two halves of the back of pelvis are evenly on the mat. Relax, very deep in front of the hip joint. Gently pull the knee into the chest, maintaining the parallel position.
BREATHE IN
Maintain the position of the knee.
BREATHE OUT
Relax the lower back and ease the knee further into the chest, maintaining the parallel position. Make sure the triangle of the pelvis is parallel to the floor.
BREATHE IN
Don’t allow the knee to move out of the stretch.
BREATHE OUT
Relax the back of the thigh and ease the knee further into the chest. Maintain the parallel position. Make sure the two halves of the back of pelvis are evenly on the mat.
BREATHE IN
Fill the back of the lungs with air. Maintain the position of the knee.
BREATHE OUT
Notice if you have any personal areas of tightness or unease. Use your out breath to soften and relax there. See if you can ease the knees closer.
BREATHE IN
Surrender the weight of the upper back to gravity. Maintain the position of the knee.
BREATHE OUT
Very consciously relax and let go of the other leg. Let it hang down.
BREATHE IN
Release the left leg. Let it slide down, along the floor.
BREATHE EASILY
Give yourself time to notice how the left leg feels in comparison the the right.
When you are ready, start on the other side.
NOTE
Take your time. As you become more familiar with recognising personal areas of tightness and resistance you may not need to go through this specific sequence. Your practice will become more personalised. Just make sure you give yourself the luxury of plenty of time and always do the same amount of breaths on each side. Even if, one side is more apparently problematic that the other.
Thank you Sophia Karasso, dancer and Refined Pilates Teacher Training student for posing for the photos and doing the short videos.
